Getting started
The Enode API lets you connect to a wide range of green energy hardware. This guide demonstrates linking devices to a user and making your first API call by fetching the user.
Copy linkPrerequisites
Copy linkFetching mocked or real devices
You have one set of credentials for the sandbox environment and one for the production environment. Before making any requests, decide whether to fetch mocked or real devices.
- For mocked or virtual devices, use the
sandboxenvironment - For real devices, use the
productionenvironment
The rest of this guide refers to the sandbox environment. For real devices, replace sandbox with production in URLs. Ensure your client_id and client_secret correspond to the chosen environment.
Copy linkCreate a virtual asset in sandbox
In sandbox, you must first create a virtual asset that represents a device you can link.
- Open your client in the dashboard and select Assets.
- Click Create new, and enter the details for the new asset by filling out the form.
- When created successfully, open the Virtual tab of your device list.
- Select the virtual asset you just created, and note the Username and Password. Use these values in the next step.
Copy linkStep 1: Get an API access token
First, call the Enode OAuth API using client_id and client_secret.
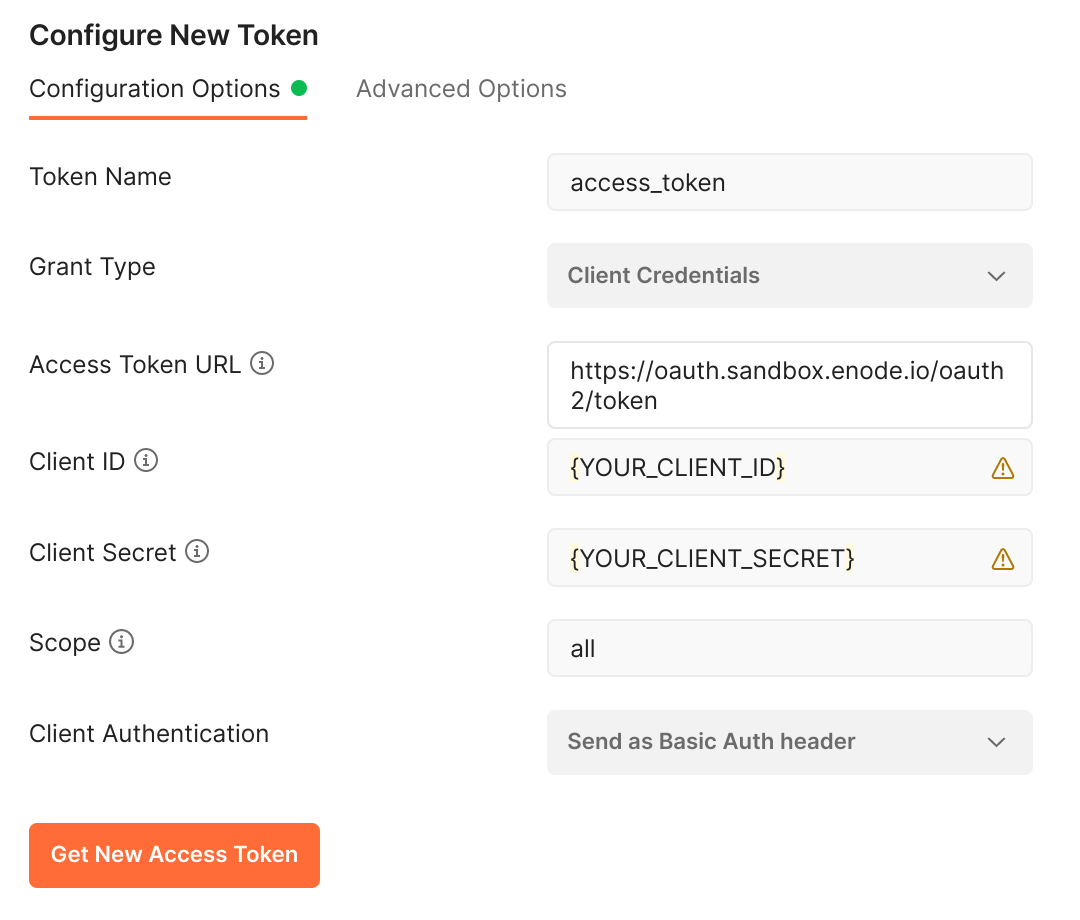
This guide uses cURL for examples, but you can use Postman. To get your access token in Postman, apply these settings. We also maintain an updated Postman collection.
In the examples below, replace the entire string inside the brackets, including the brackets.
curl https://oauth.sandbox.enode.io/oauth2/token \
-X POST \
-u {YOUR_CLIENT_ID}:{YOUR_CLIENT_SECRET} \
-d "grant_type=client_credentials"
If you provided the correct values, you should receive a successful response containing an access_token.
{
  "access_token": "{YOUR_ACCESS_TOKEN}",
  "expires_in": 3599,
  "scope": "",
  "token_type": "bearer"
}
Copy linkStep 2: Create a Link session
Next, use the access_token to create a Link sessionAPI. This grants the user temporary access to Enode Link UI, a web interface for connecting hardware to your app.
curl https://enode-api.sandbox.enode.io/users/59fb2aba/link \
-X POST \
-H "Authorization: Bearer {YOUR_ACCESS_TOKEN}" \
-H "Content-Type: application/json" \
-d '{
  "vendorType": "vehicle",
  "scopes": [
    "vehicle:read:data",
    "vehicle:read:location",
    "vehicle:control:charging"
  ],
  "language": "en-US",
  "redirectUri": "https://localhost:3000"
}'
The userId in the call, such as 59fb2aba, should be a unique string that identifies your user, preferably your user's primary key in your system. The API will automatically create a user if it doesn't recognize the userId. Refer to our API referenceAPI for more details.
A valid access_token results in a successful response with a linkUrl.
Link response
{
  "linkToken": "WFiMjNjZDRANThlZmIyMzMtYTNjNS00Njk...", // Used by the Link SDK
  "linkUrl": "{YOUR_LINK_URL}" // Redirect or display in in-app browser
}
Please note that this API call requires an API version of 2024-01-01 or higher. If you are following this guide using a client created before January 1st 2024, please set a version header or change your default client version. For more information, you can refer to our versioning guideAPI.
Copy linkStep 3: Link a device through Link UI
Open the linkUrl from the previous step in your browser.
Be sure to choose the vehicle brand of the asset you created earlier and use the username and password provided to you. You may use any two-factor authentication code.
Proceed to the flow until you see the success screen, and tap Complete. You can learn more about the device linking journey in our Link UI guide.
Tapping Complete on this screen redirects to your specified redirect URL (the redirectUri parameter in the Link call from the previous step). Refer to our API referenceAPI for more details.
Copy linkStep 4: Fetch the user
After linking vehicles to your user, fetch the user using the /users/{userId} endpoint.
curl https://enode-api.sandbox.enode.io/users/59fb2aba \
-X GET \
-H "Authorization: Bearer {YOUR_ACCESS_TOKEN}"
With correct values, you'll receive a response containing the user object. The linkedVendors array should include the vendor linked in step 3.
{
  "id": "59fb2aba",
  "linkedVendors": [
    {
      "vendor": "{YOUR_LINKED_VENDOR}", // For example: "TESLA", "VOLKSWAGEN"
      "isValid": true
    },
    // If you linked additional vendors, they will show up here
  ]
}
Copy linkAll done!
Congratulations on making your first call to the Enode API! To learn more about using our API, you have a couple of options:
The integration journey with Enode
The ins and outs of our endpoints