Introduction
Link UI lets you connect your users’ devices to your app. It handles sign-in validation, multi-factor authentication and every other connection detail for each vendor that Enode supports, all while guiding your user through the required steps.
Copy linkThe user journey
Copy linkStep 1: Introduction
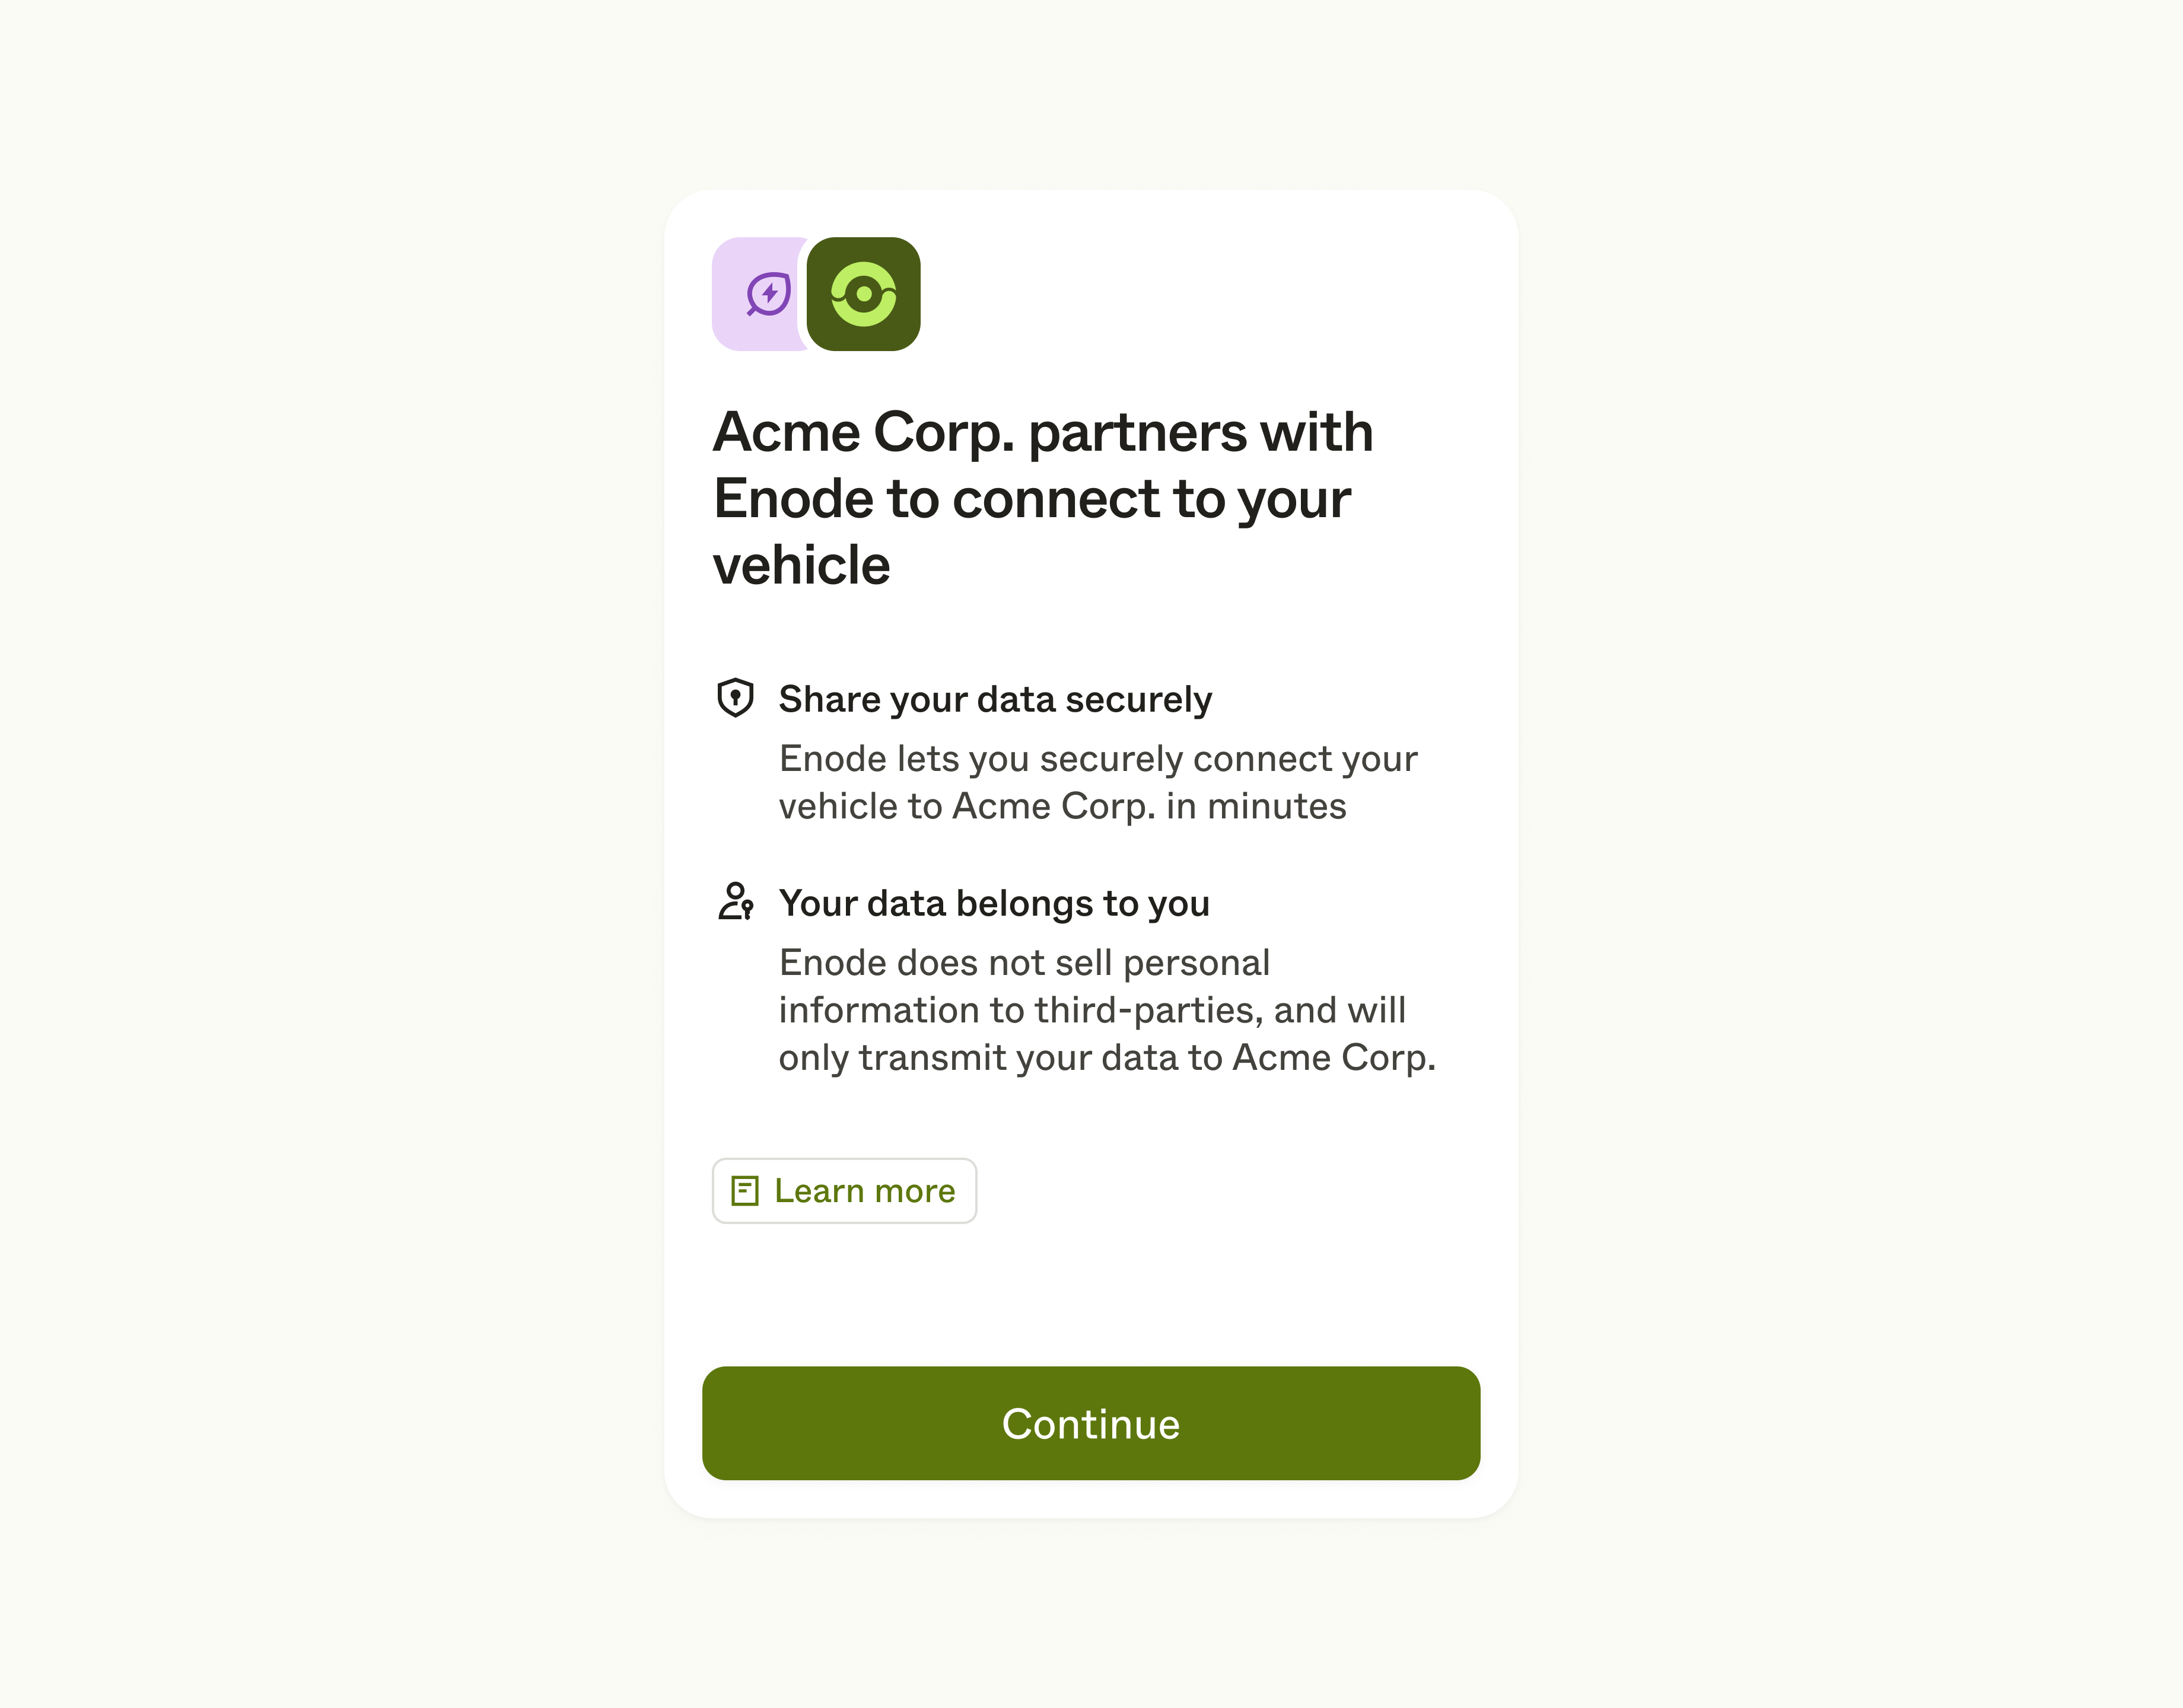
The introduction view is the first view your user will see after you have redirected them from your app. It acts as a handshake between your app and Link UI, and explains the role of Enode in the connection process.
Your user can tap the Learn more button to bring up a modal view going deeper on Enode and our role in the connection process.
Copy linkStep 2: Brand and service selection
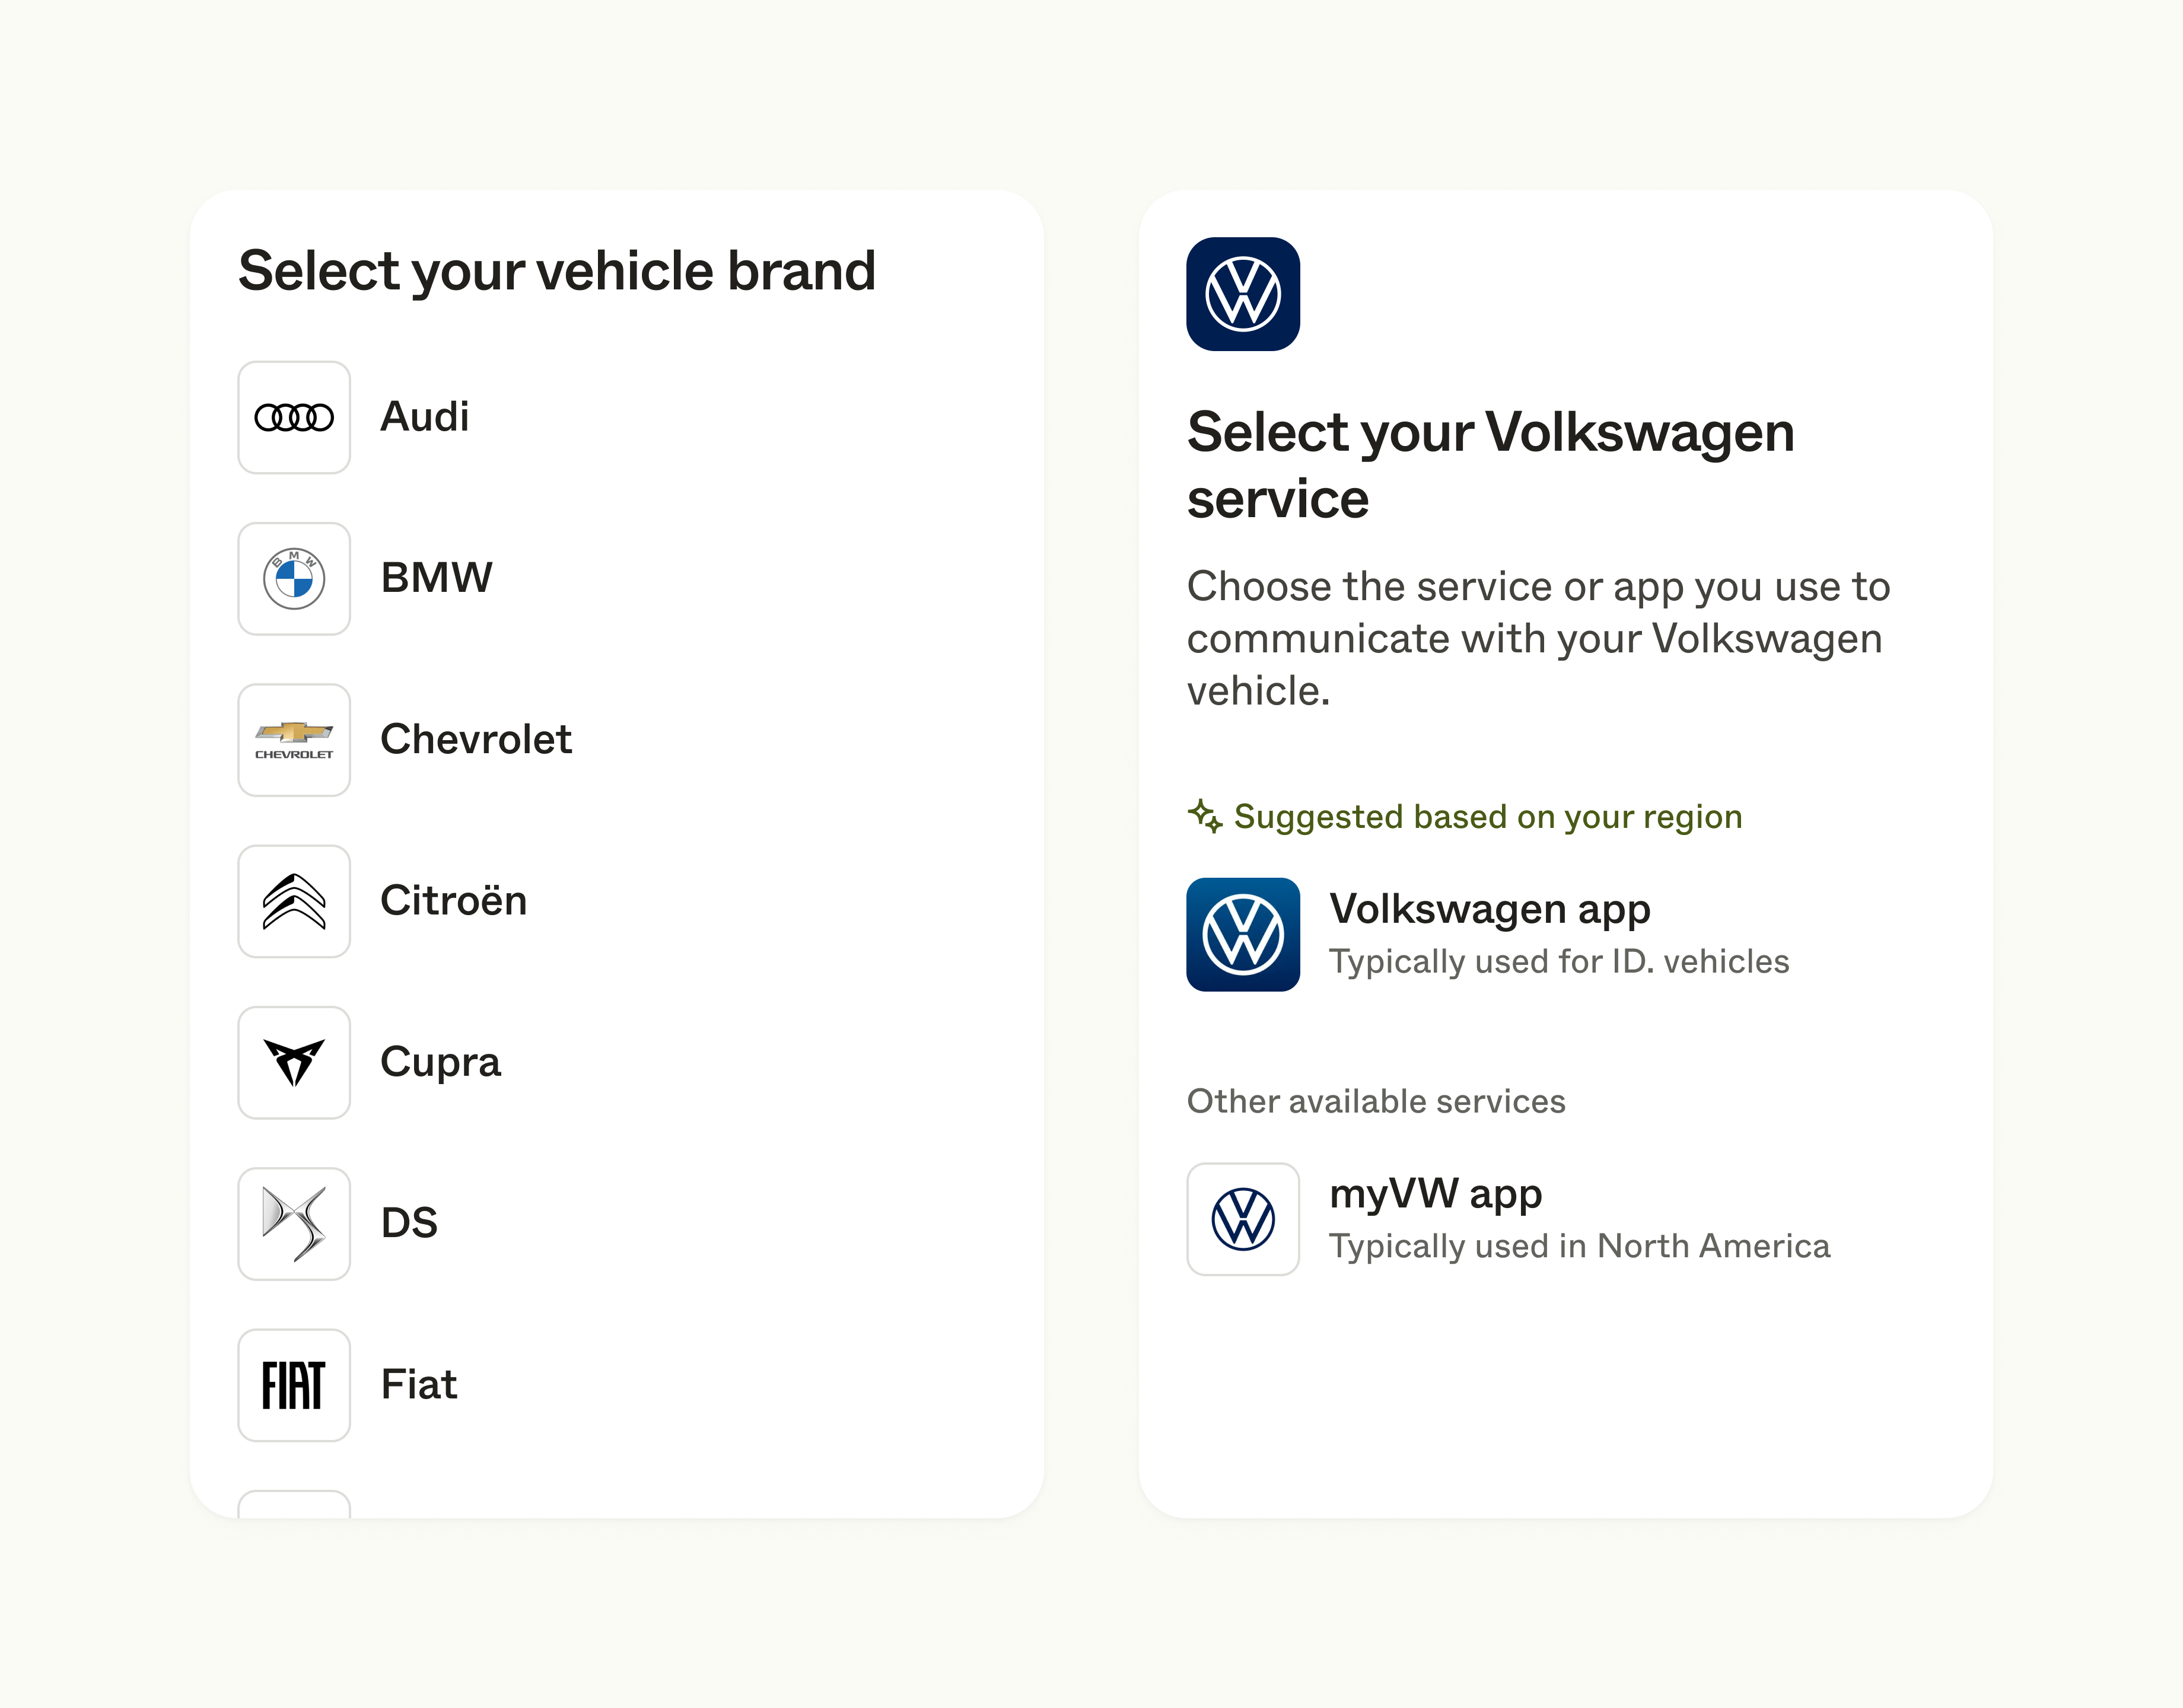
Next, your user will select the brand of their device. Additionally, some brands will have multiple services or apps available to their users, often split by geographic regions or specific models. In this case your user needs to choose the service or app they use to communicate with their device. Where possible, suggestions will be presented based on the region your user is visiting from.
If your user can’t find their brand, they can tell you which one they were looking for from the bottom of this screen. See Unsupported brands.
Copy linkStep 3: Review data access
Proceeding, your user will be presented with a quick overview of which data and controls will be accessed and shared between their device and your app. Depending on the scopesAPI you specify when initiating the linking session, it will also clearly state which data and controls will not be accessed.
Your user can tap the scopes to get more insight into each specific scope. The scope information modal lists the data that is part of the scope. To reinforce the necessity of the scope, it also contains examples of how the access can be utilized.
Once your user proceeds from here by tapping Continue, it is considered as consent for data processing as required by GDPR regulations, and to Enode's privacy policy.
Copy linkStep 4: Sign-in and two-factor authentication
Copy linkStep 4.1: Sign in to a brand account
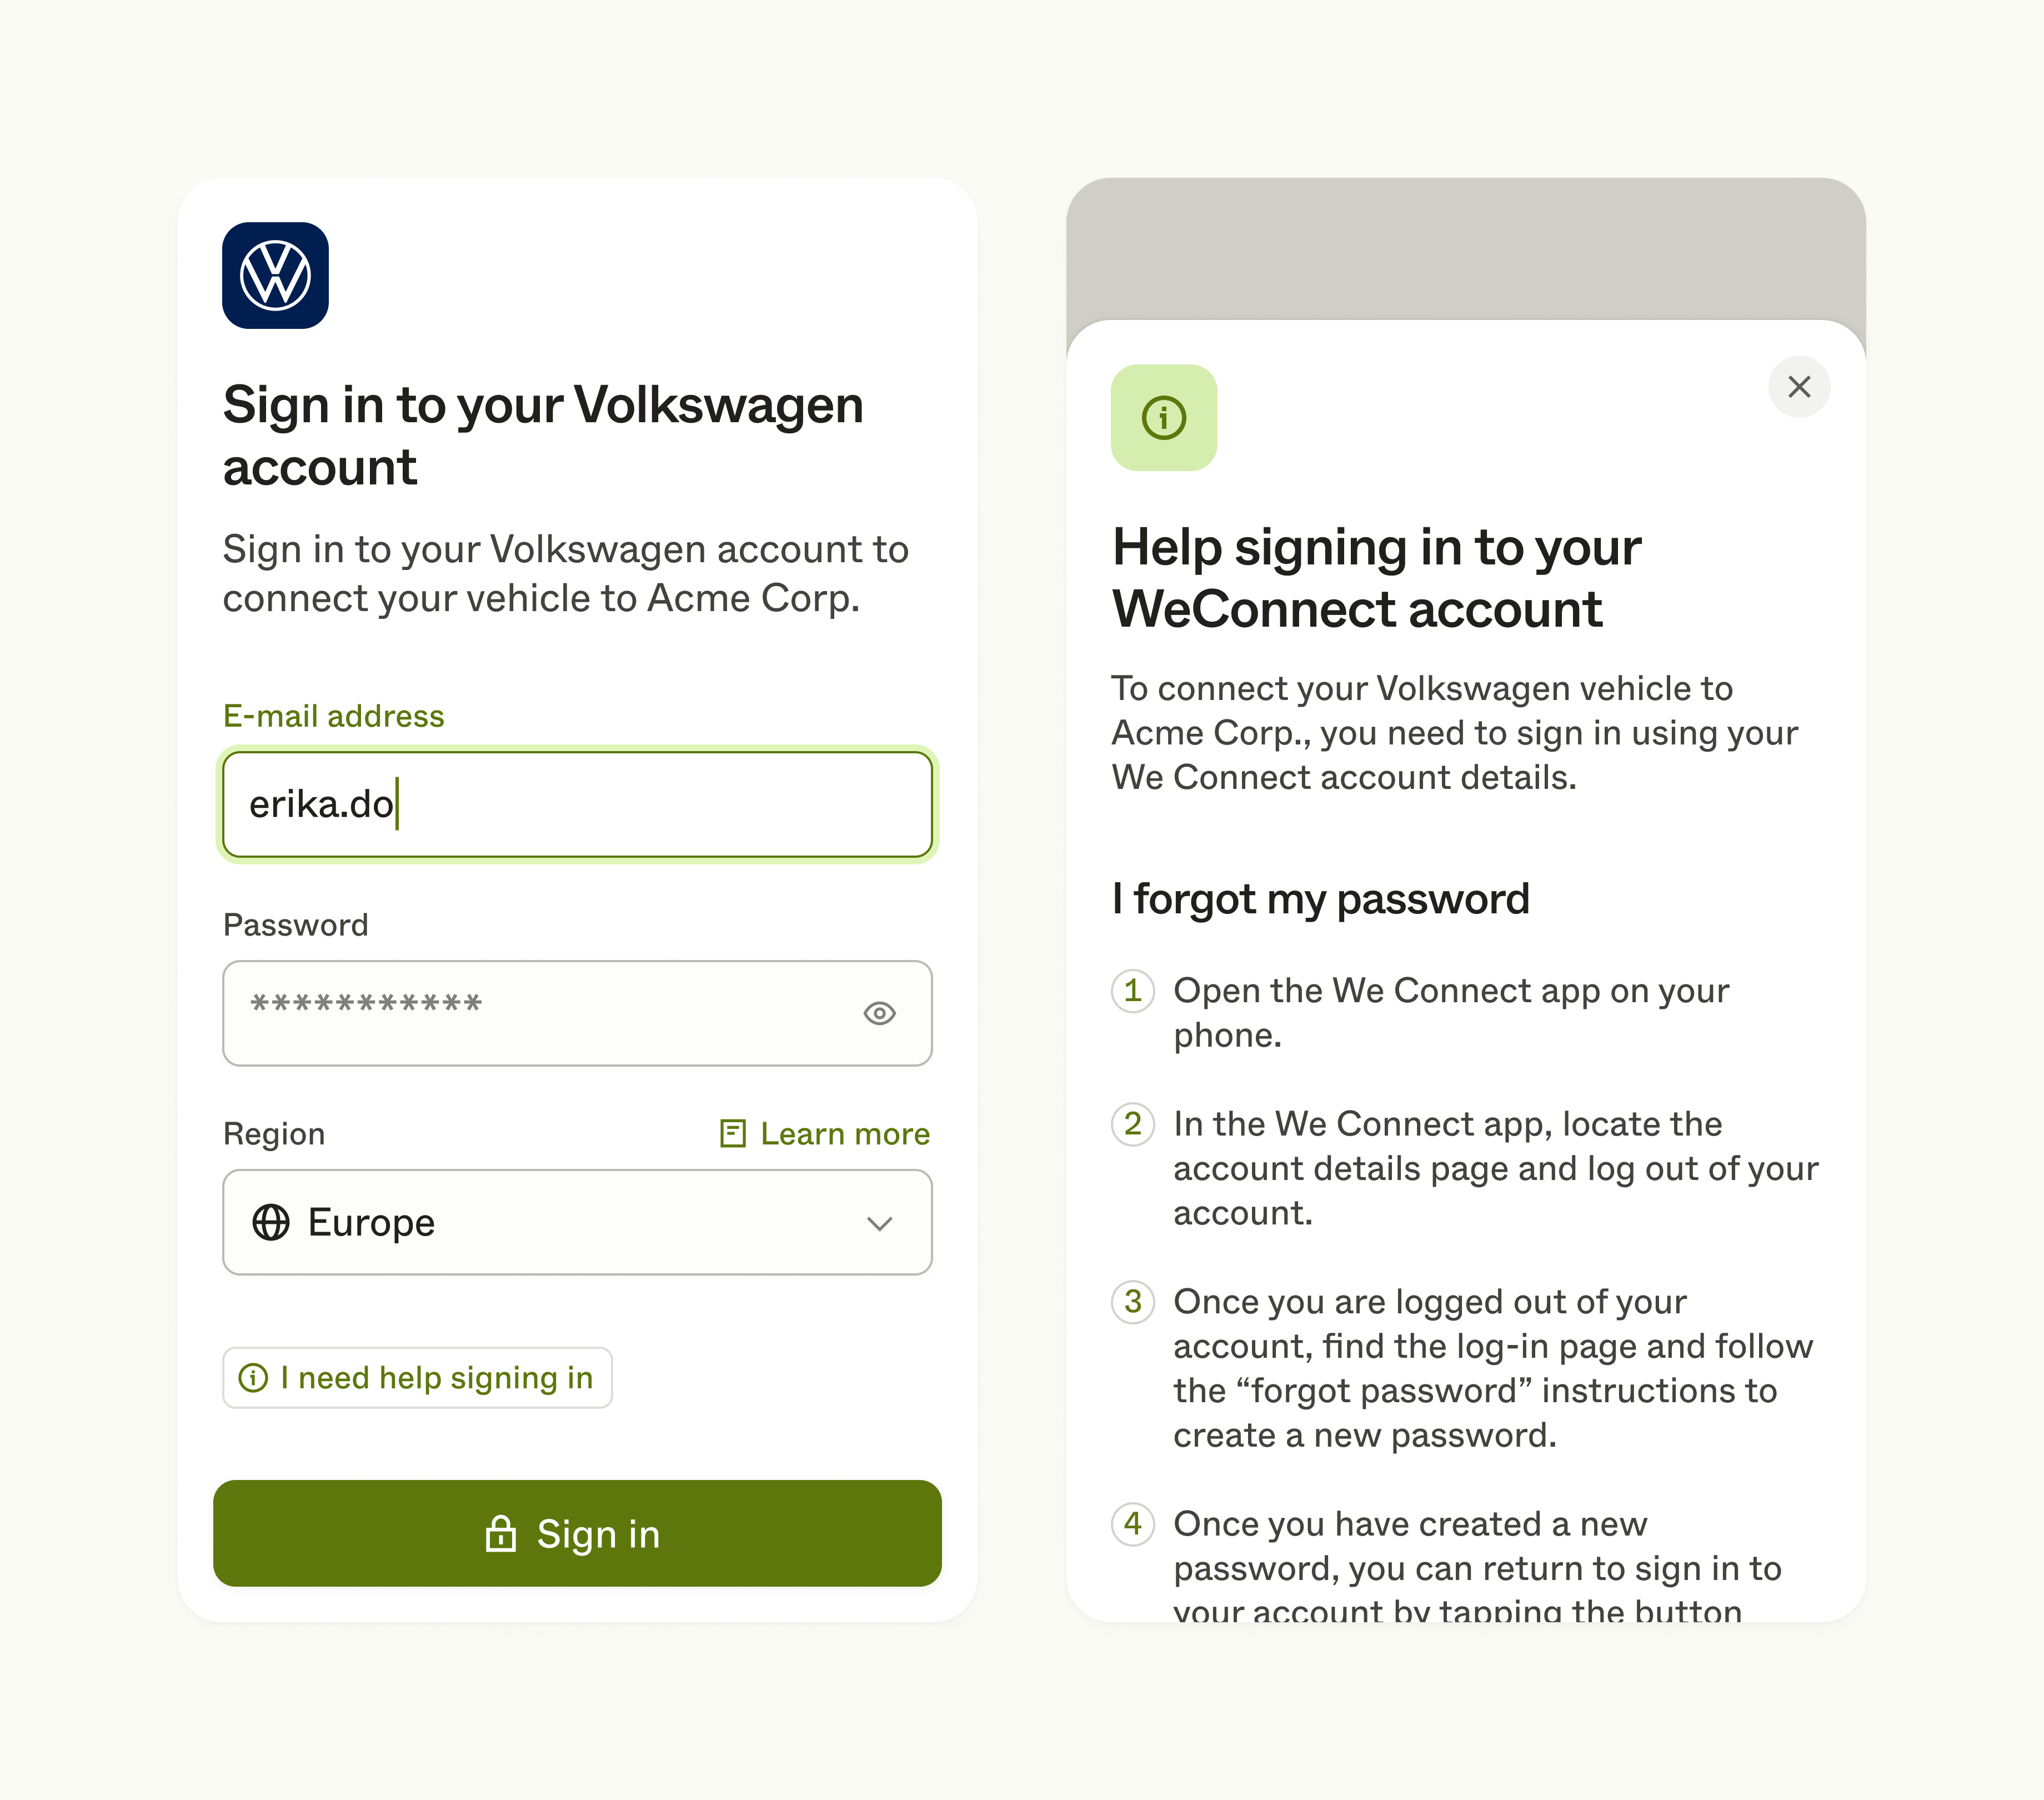
To connect their devices, your user needs to sign in to their account for their specified device brand. If your user selected a service or app in step 2, they will sign in to the account relating to the specified brand service or app.
The type of account credentials presented in the initial sign-in step are specific to each brand, service or app — and vary from e-mail and password combinations to phone numbers only. In some cases, if a brand has split their service or app infrastructure into multiple regions, a region selector will be visible with the region of your user pre-selected.
If your user enters invalid credentials, they will be guided by specific error messages, and can tap I need help signing in to open a modal view with specific instructions for their selected brand. This modal view includes instructions for what to do if they have forgotten their username or password, or how they can create an account if they don’t already have one.
Copy linkStep 4.2: Two-factor authentication
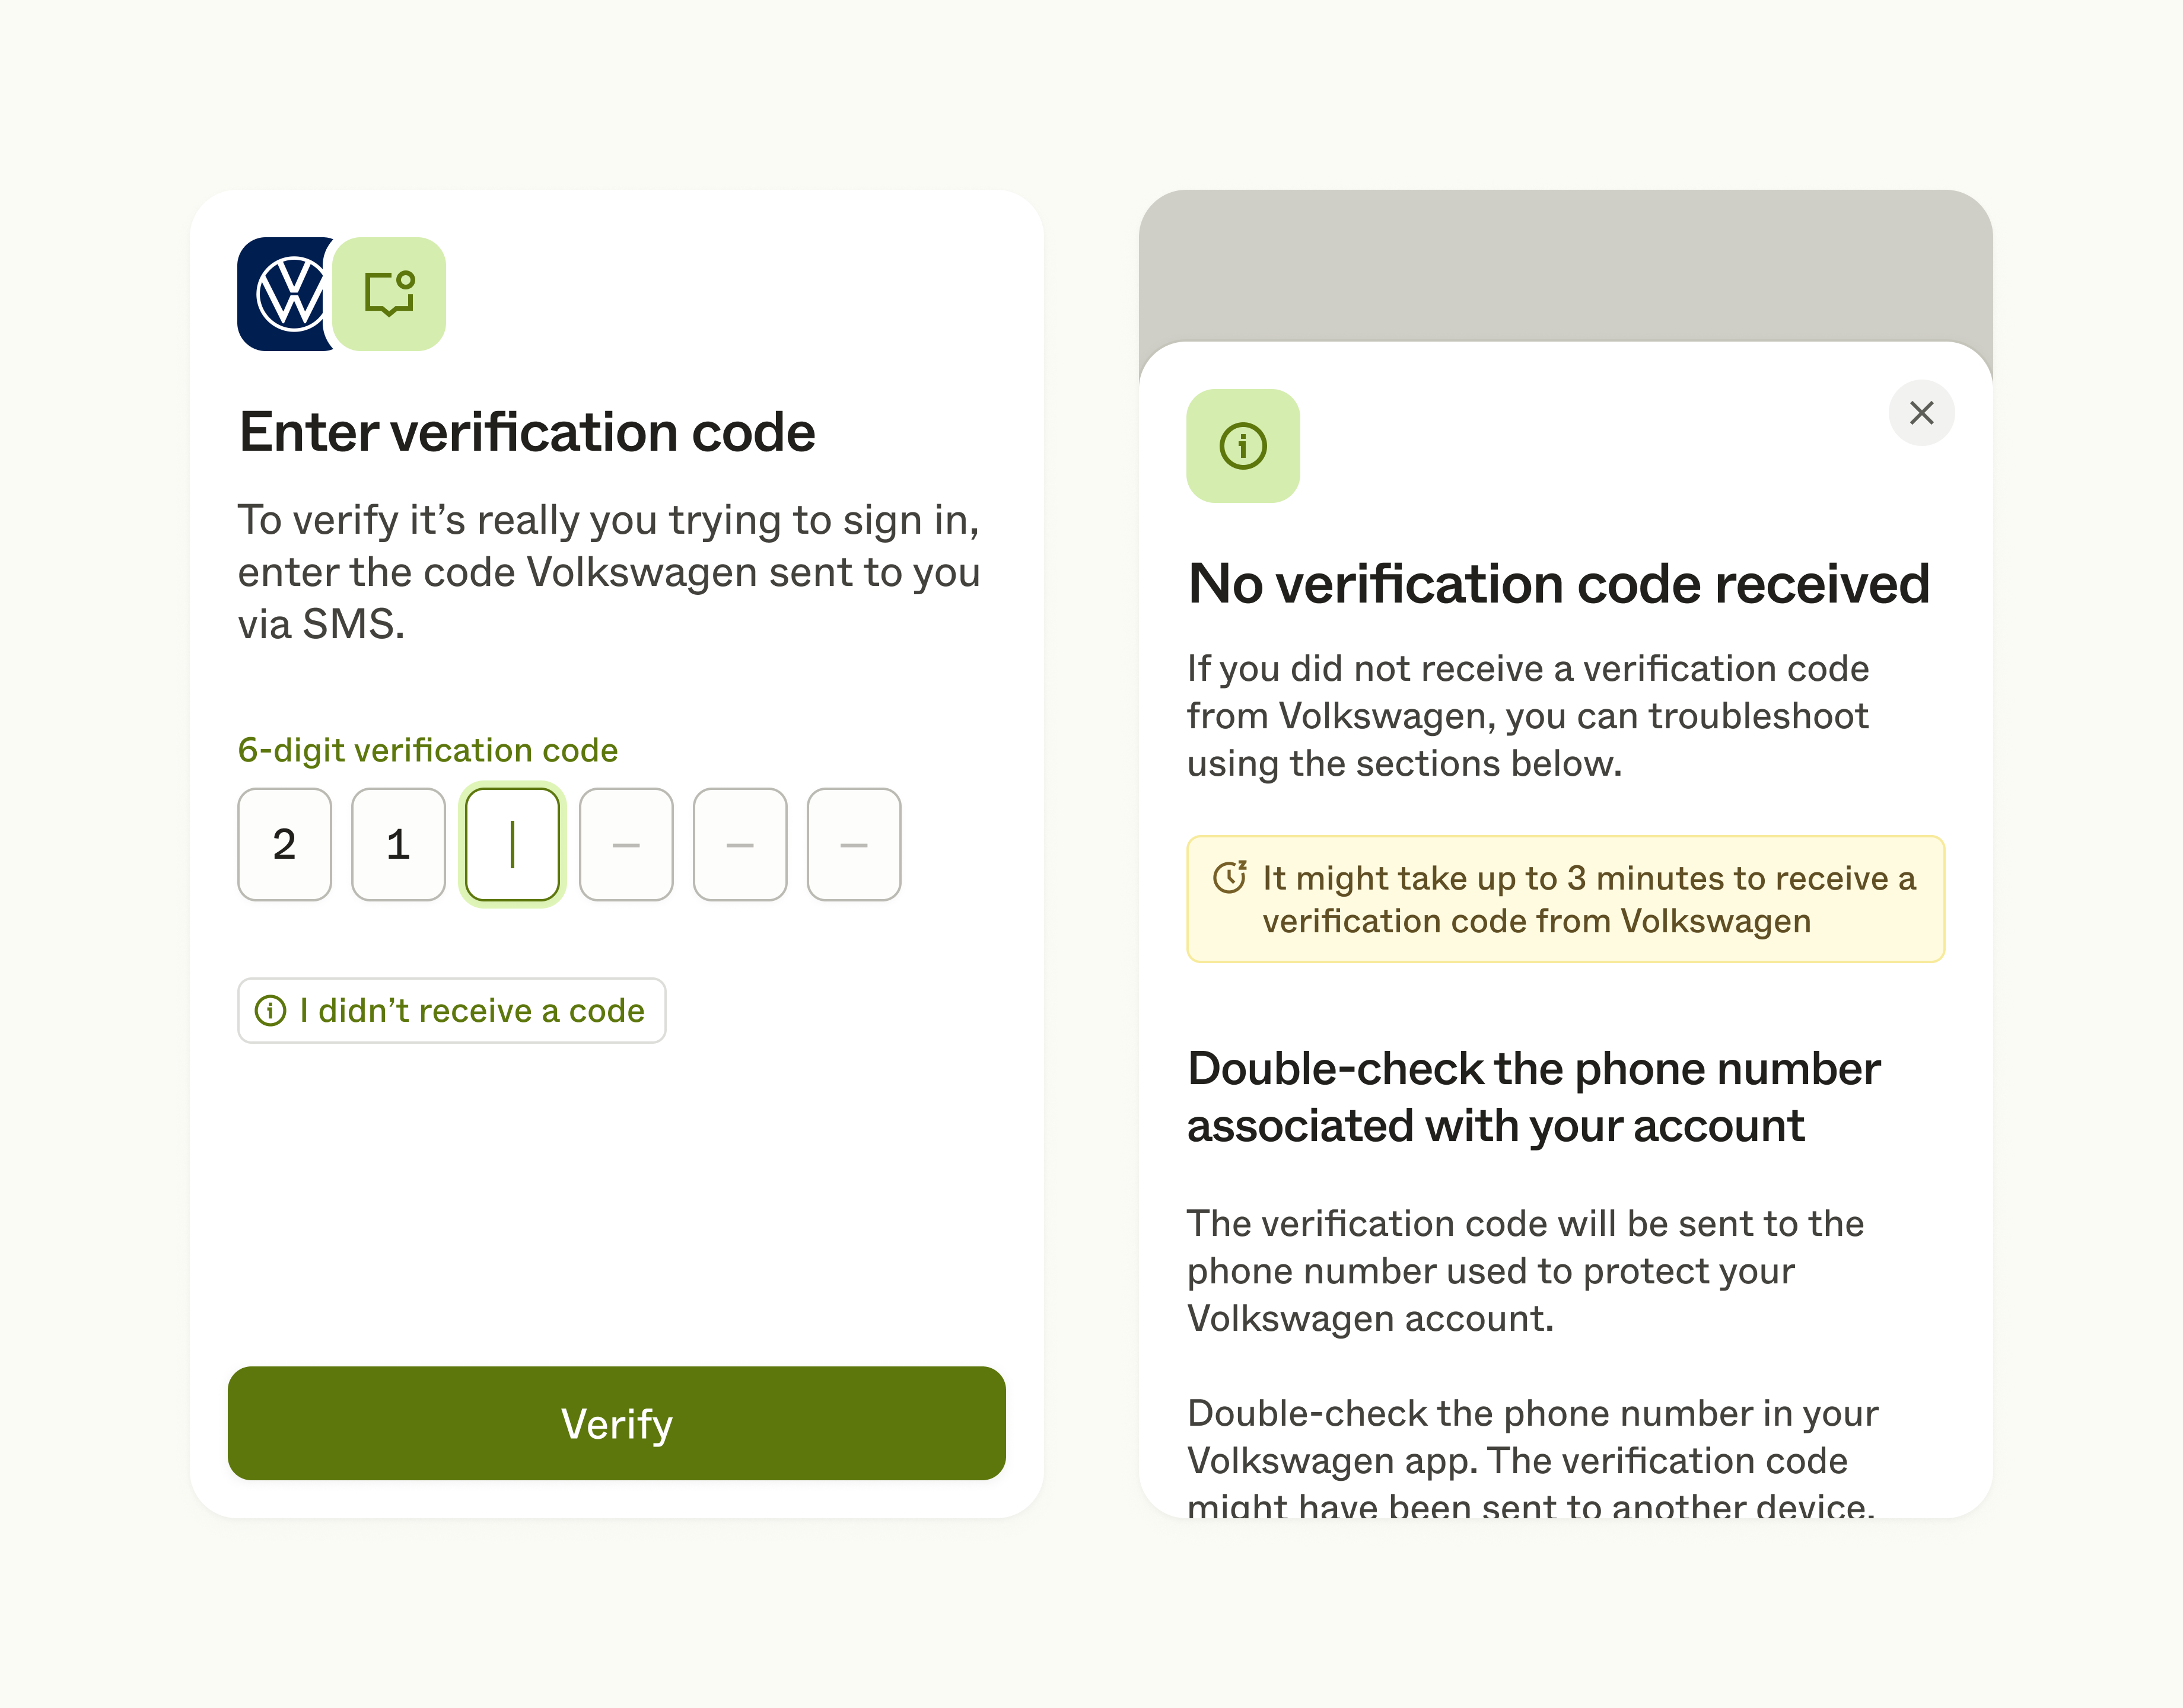
Following the initial sign-in step, your user might also be presented with a verification step before they are successfully signed in. This additional two-factor authentication step will be shown to your user if it’s required by the brand. Options can range from SMS or e-mail code verification, to app verification to a personal PIN.
By tapping Verify, they proceed to the devices found step. Your user can tap a help button if needed, e.g. I didn’t receive a code, and will get guidance for how to troubleshoot their specific situation.
Copy linkStep 5: Devices found
Copy linkStep 5.1: Devices found
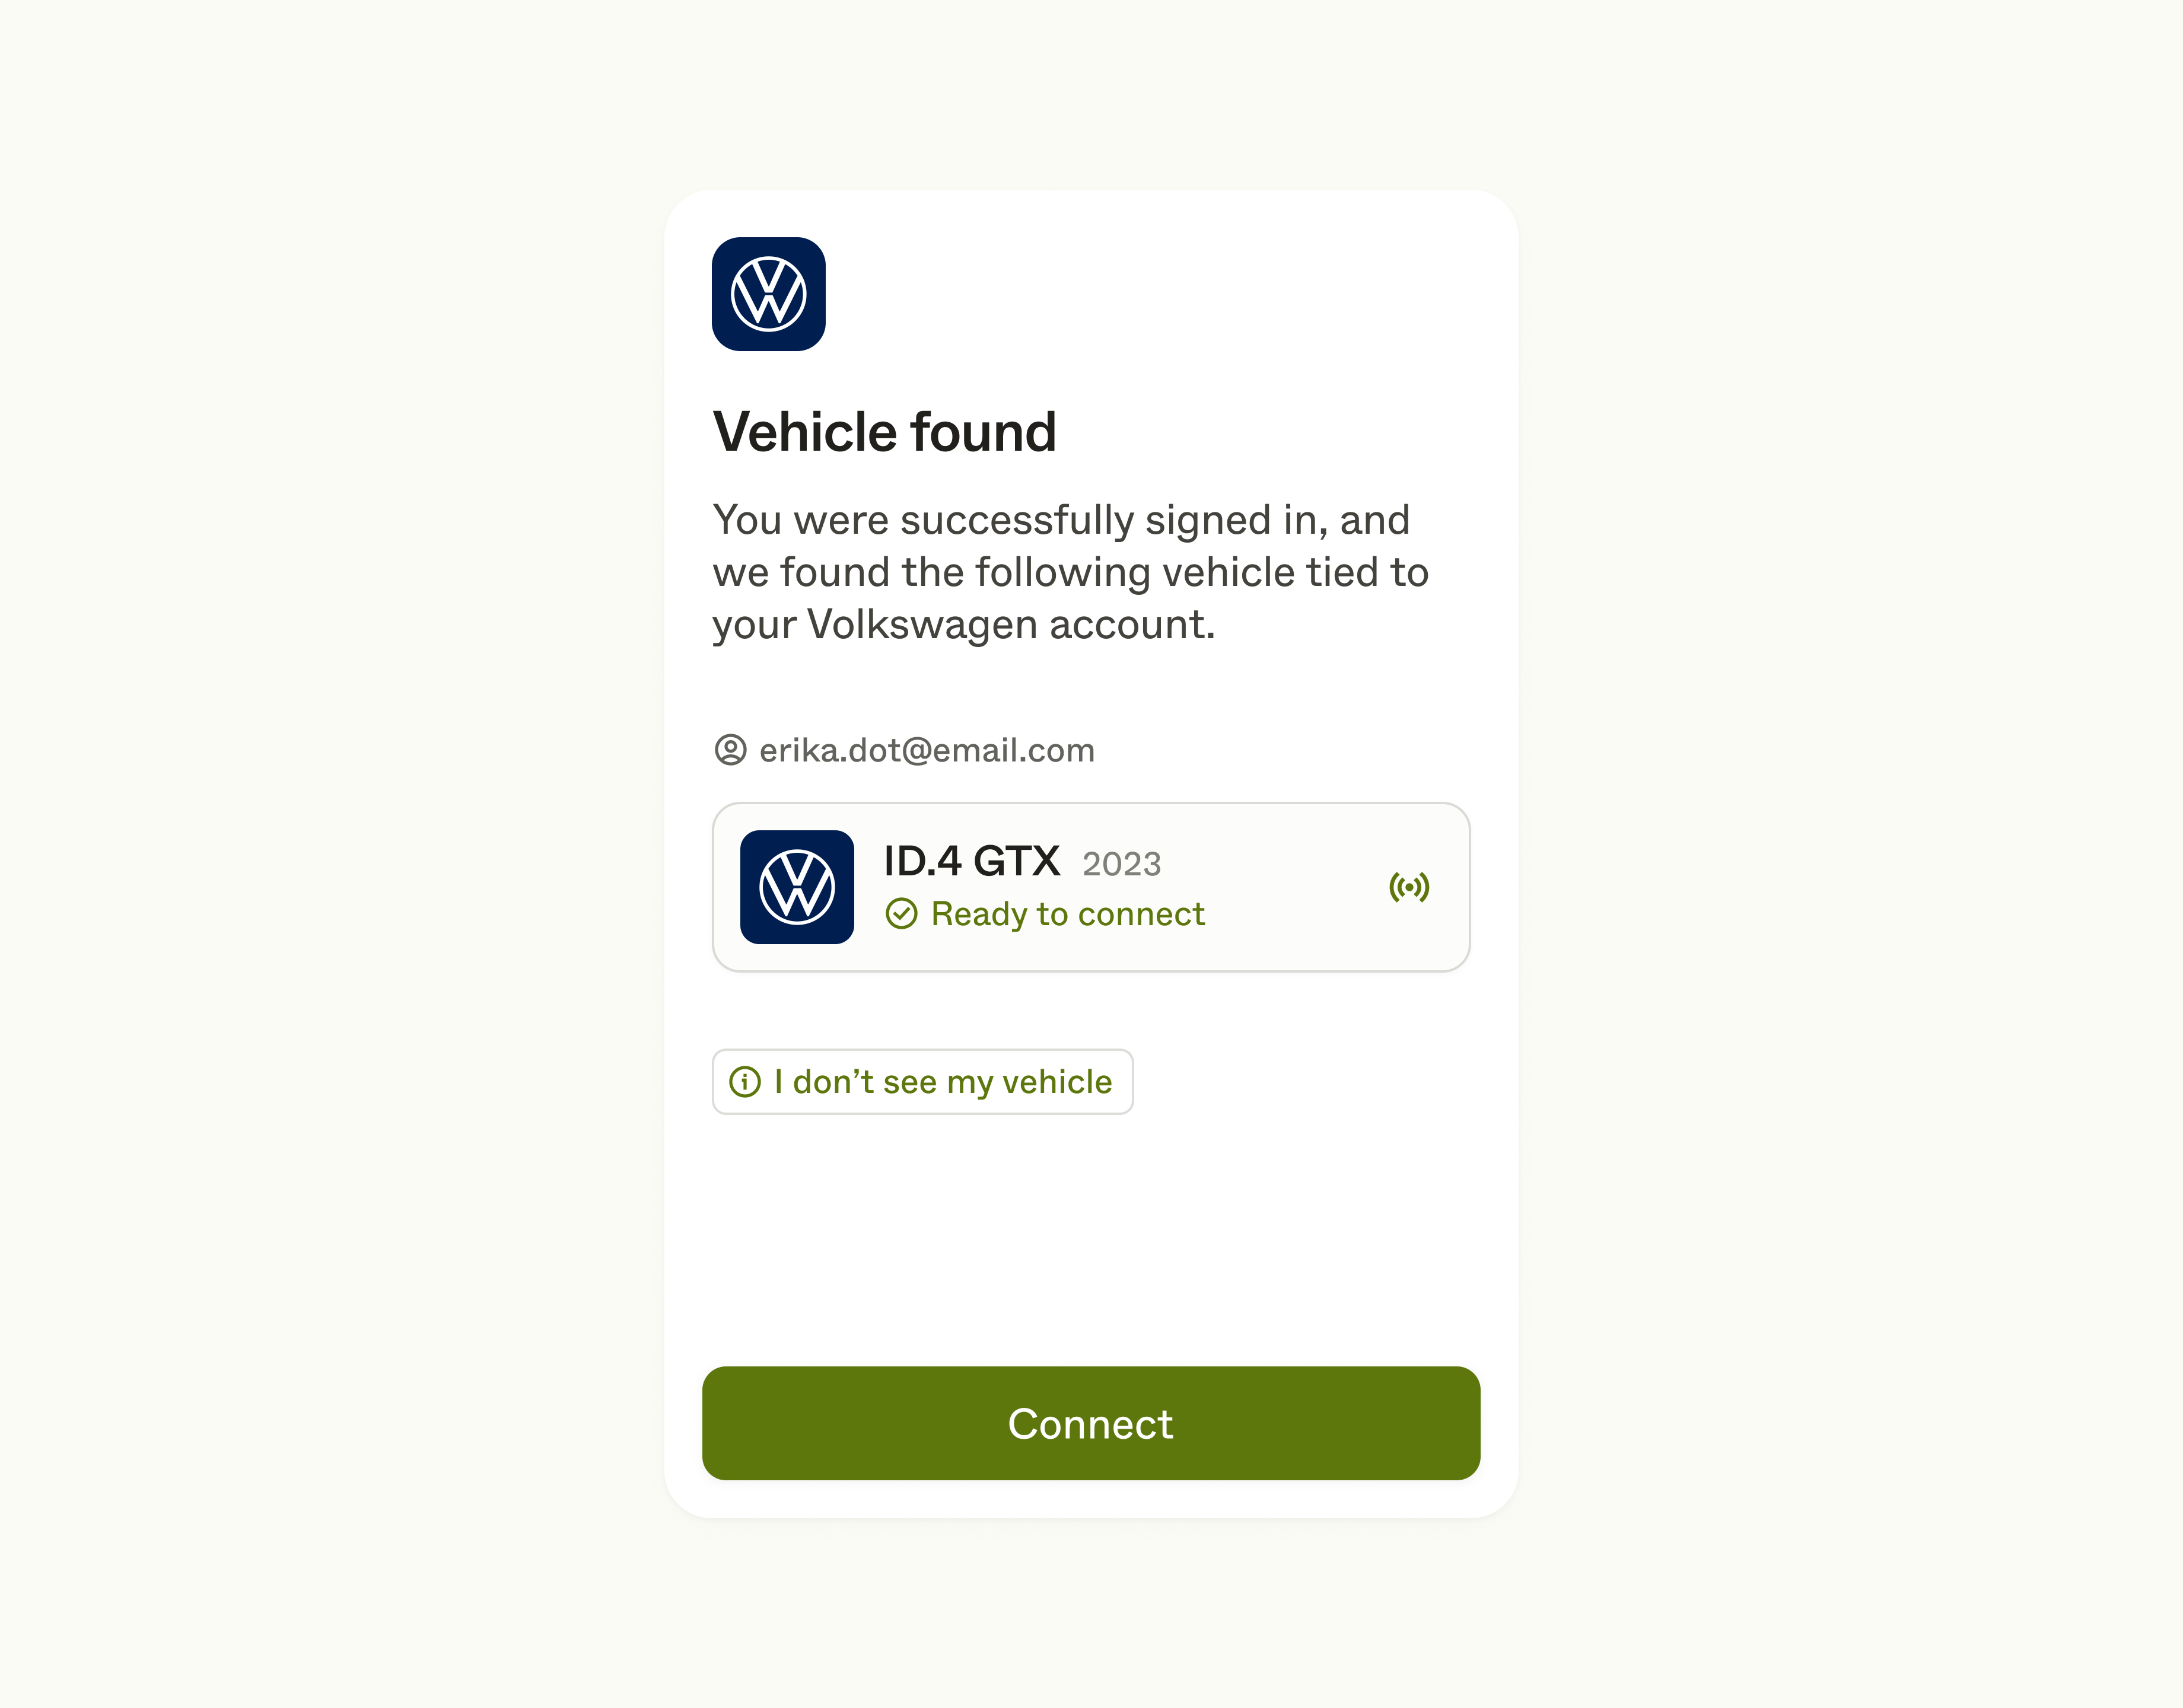
After the sign-in and verification steps are completed, your user will be presented with the device(s) found within their account.
If they do not see the device they expected to see, they can open a modal help view (e.g. I don’t see my vehicle) for further assistance. After tapping Connect, they will be presented with a success view.
Copy linkStep 5.2: Bluetooth pairing
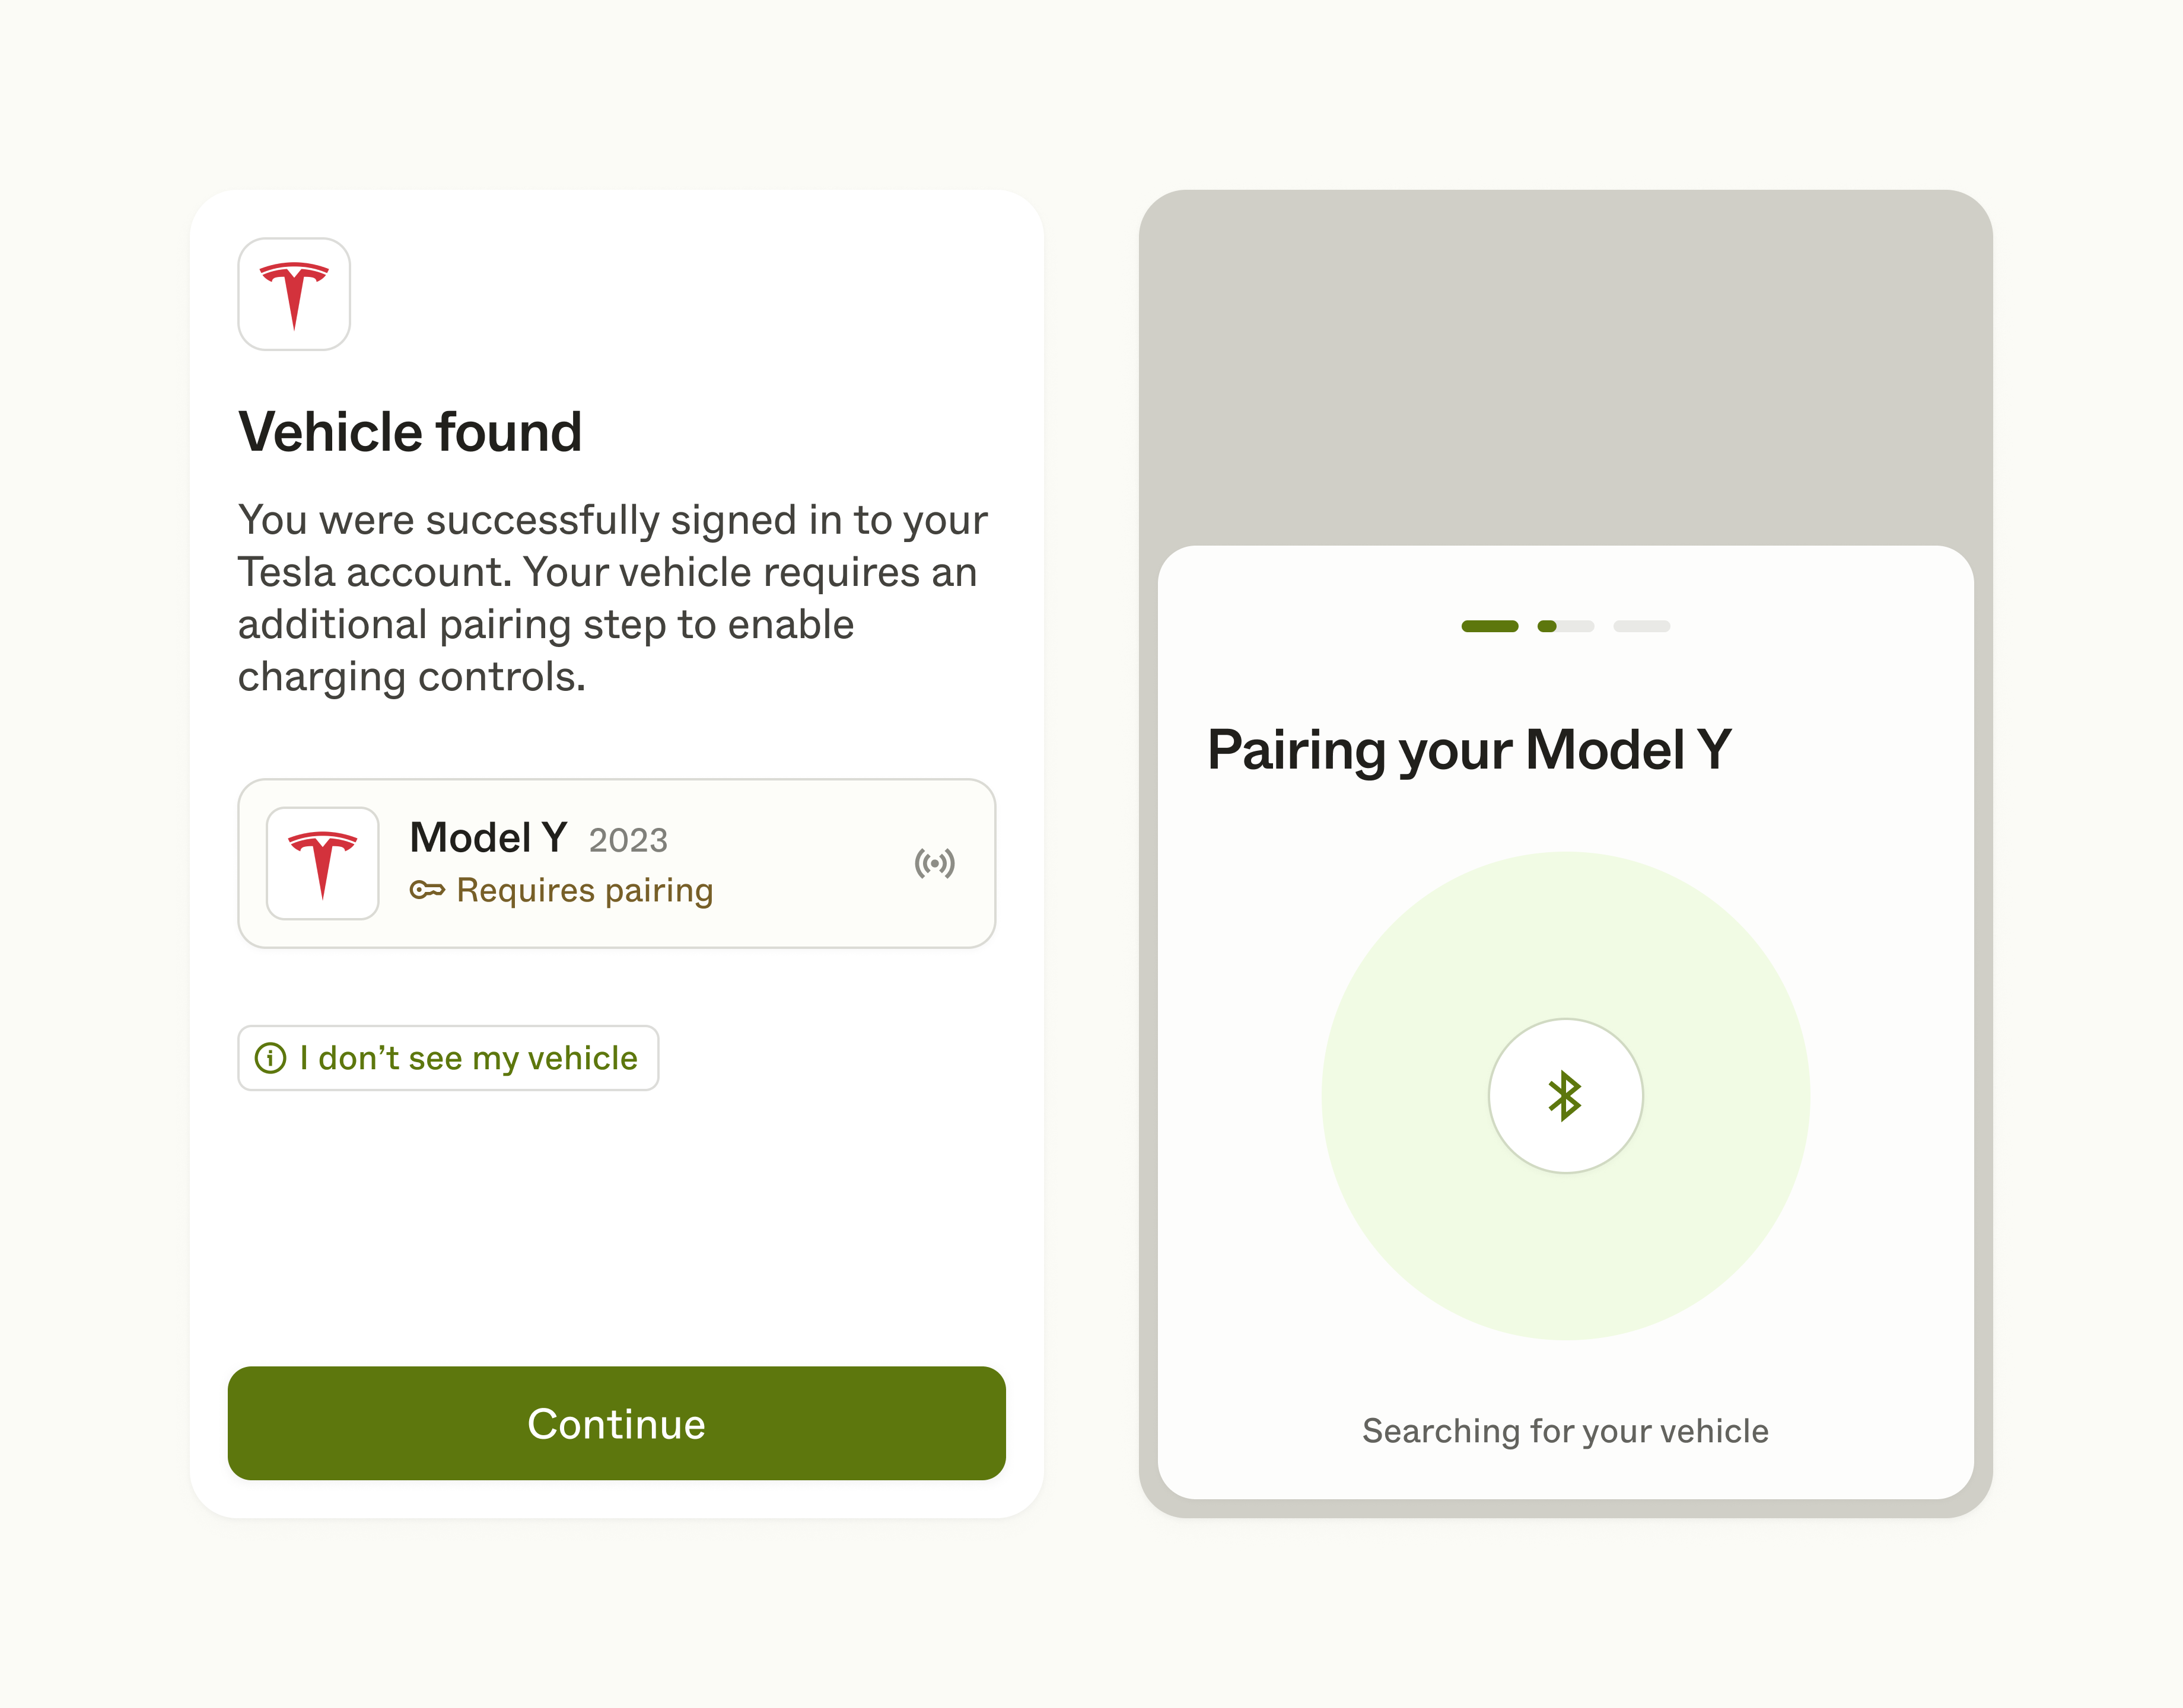
Some vehicle brands require an extra Bluetooth pairing step in addition to the required sign-in step and occasionally required two-factor authentication step. This step requires your user to do a combination of specific tasks in or in the proximity of their vehicle, and includes connecting to the vehicle via Bluetooth.
In these cases, your user will be presented with another state of the devices found view. Link UI will guide your users through each step in detail: from what they need to prepare, to connecting to the vehicle via Bluetooth, and any additional steps performed via the vehicle infotainment system or first-party app. They enter this flow by tapping Continue.
Copy linkStep 5.2.1: Multiple vehicles requiring pairing
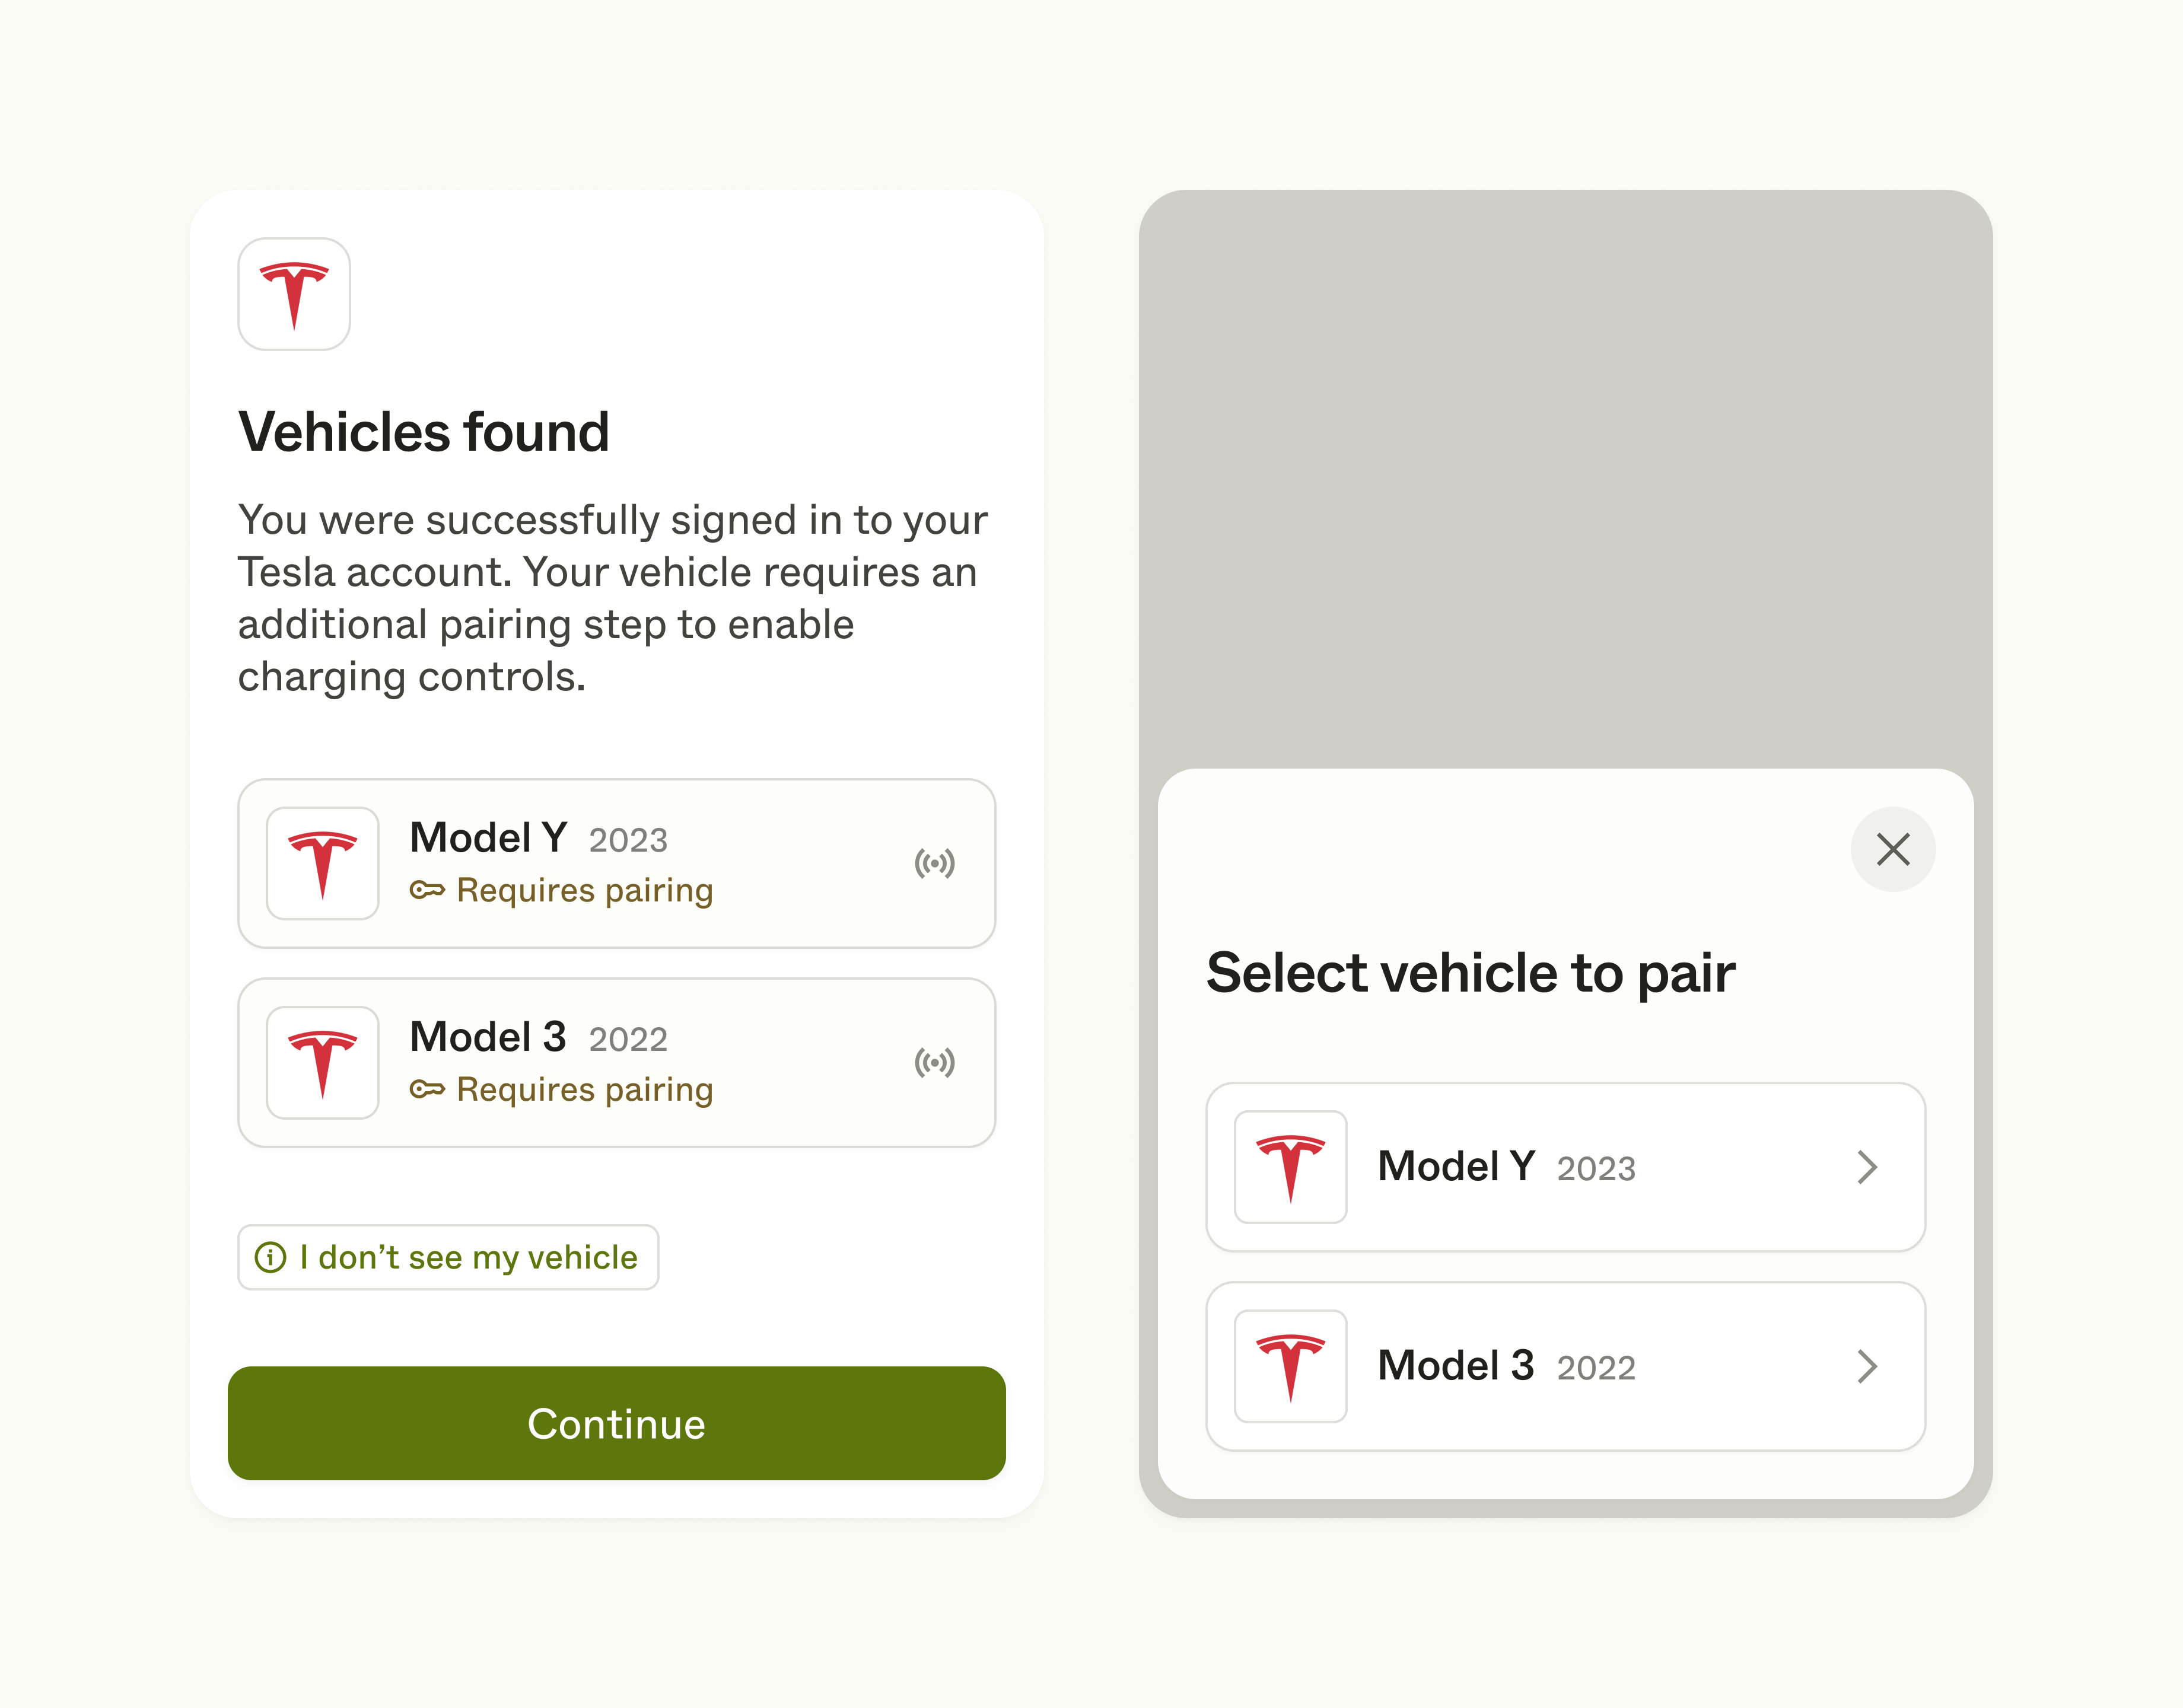
If there are multiple vehicles tied to their vendor account that requires Bluetooth verification, they will be prompted to pair each vehicle.
Copy linkStep 5.2.2: Skipping pairing
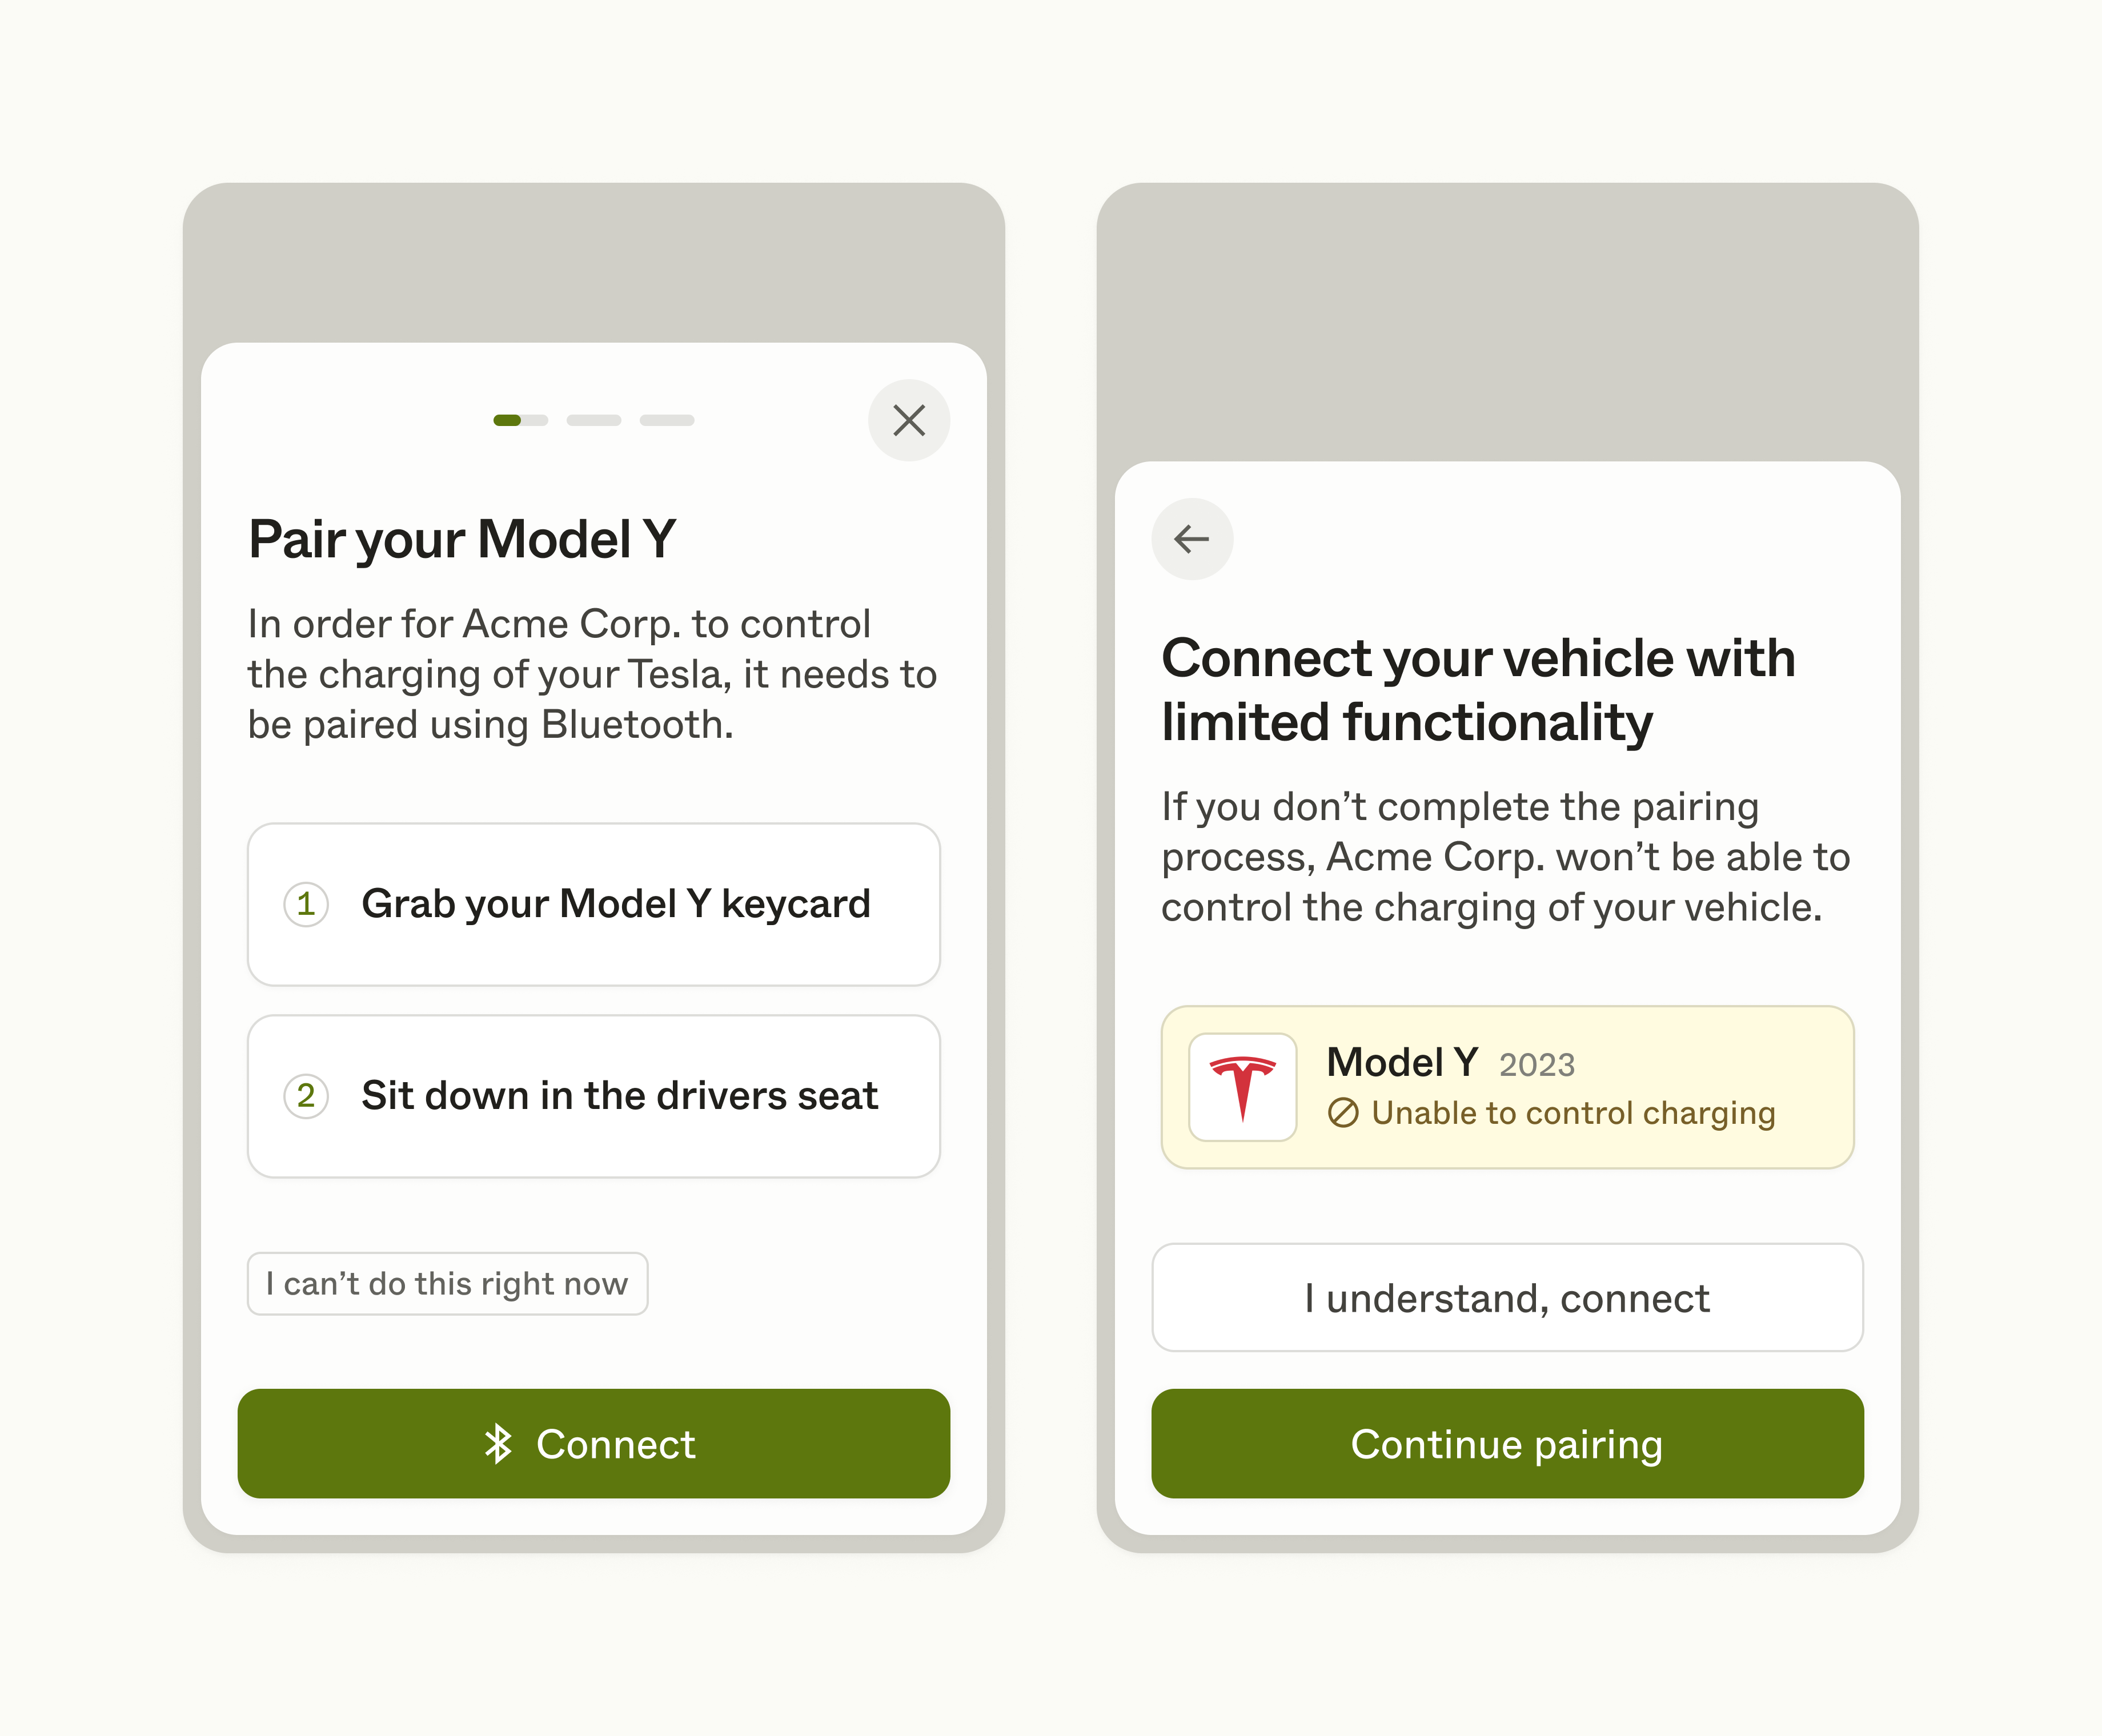
For cases where your user cannot physically access their vehicle at the time of linking, they will be able to skip the process by pressing I can't do this right now. As a heads-up, they will be informed that the vehicle(s) they wish to connect without pairing will have limited functionality. After sucesssfully connecting their vehicle(s) with limitations, a re-linking intervention will be registered, which allows your user to go back into the Link UI flow to pair their vehicle(s) with Bluetooth.
Copy linkStep 6: Success
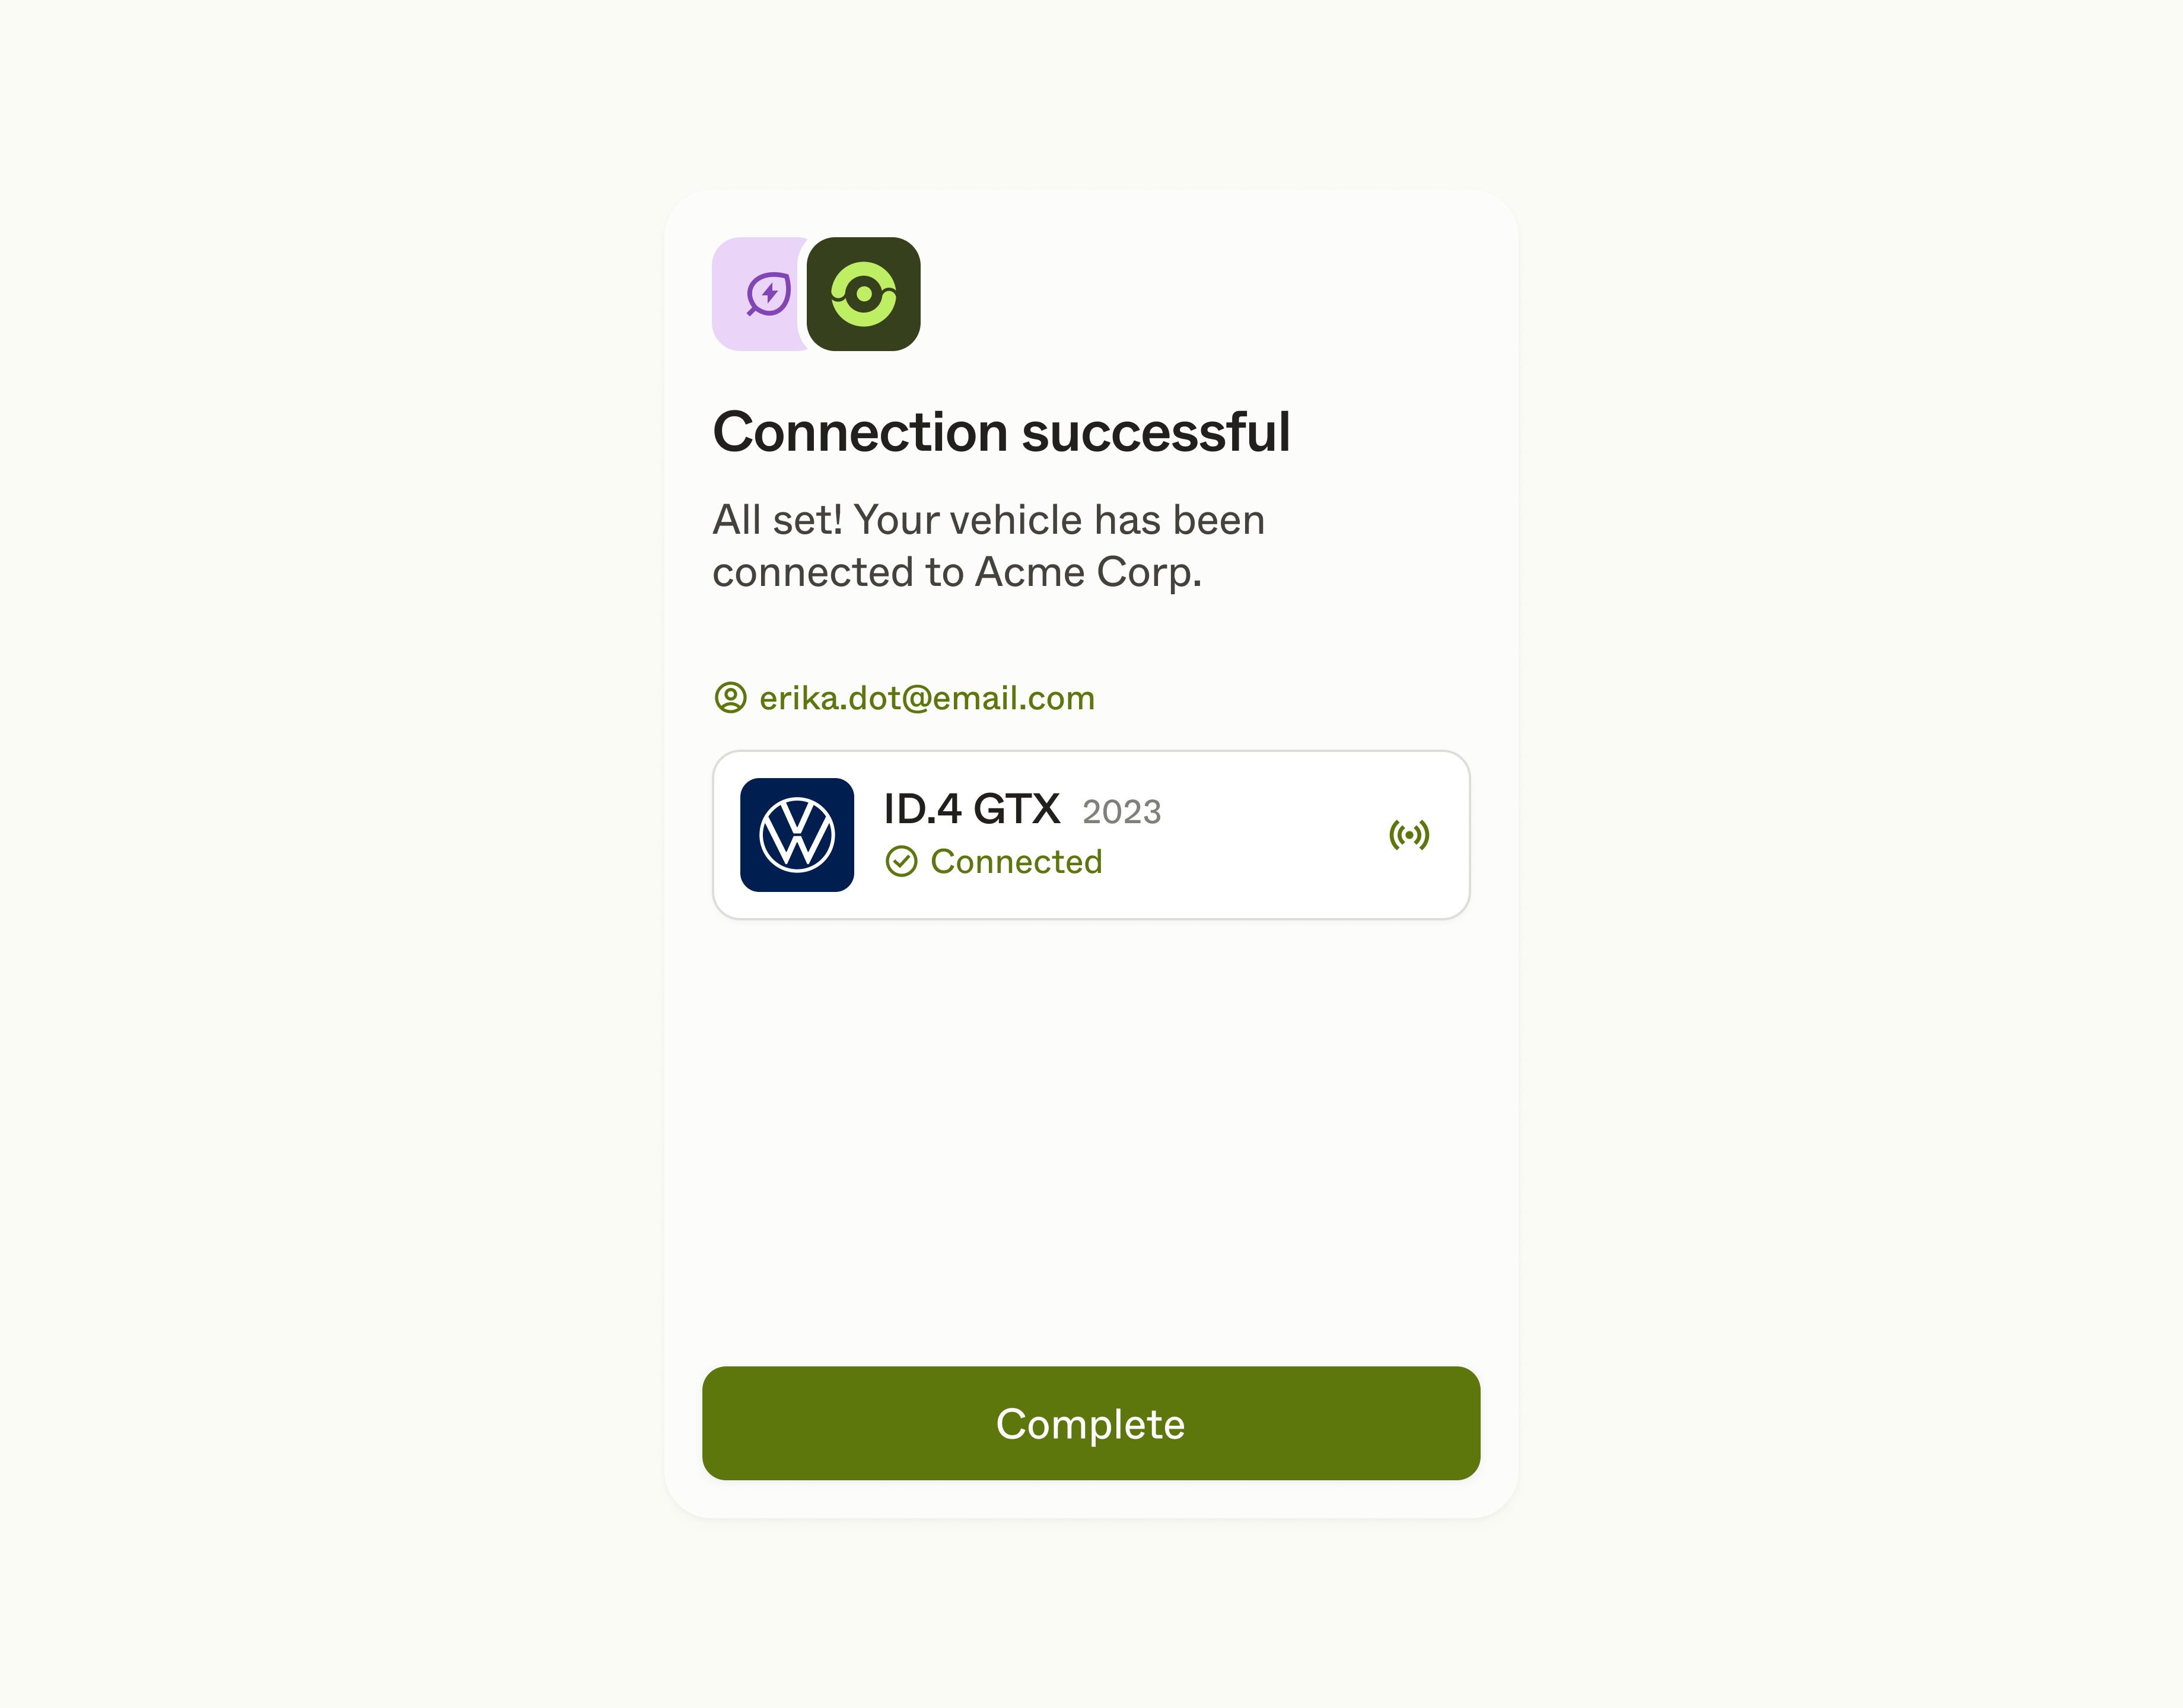
Lastly, your user will get a connection confirmation. By tapping Complete, they will be redirected back to your app.
Copy linkIntegrating Link UI in your app
Copy linkInitiating a linking session
To link devices to your app, you will use the Link userAPI endpoint. This endpoint does two things in parallel: it creates a user entity if the specified user ID does not already exist, and initiates a short-lived (24 hours) single-use link session. You can refer to our API referenceAPI for more details.
Request sample
curl https://enode-api.{ENVIRONMENT}.enode.io/users/{USER_ID}/link \
  -X POST \
  -H "Authorization: Bearer {YOUR_ACCESS_TOKEN}" \
  -H "Content-Type: application/json" \
  -d '{
        "vendorType": "vehicle",
        "language": "en-US",
        "scopes": [
          "vehicle:read:data",
          "vehicle:read:location",
          "vehicle:control:charging"
        ],
        "colorScheme": "system",
        "redirectUri": "yourapp://integrations/enode"
      }'
The link session is accessed via the returned link URL or link token, depending on your integration method.
Response sample
{
  "linkUrl": "https://link.enode.com/YzIwZThhYjYtMjMzMi00ZTAyLTg0OTYtYzdjOTlhZTY3Zjc3QDI2YzI1MDExLTdhYTctNGE2NS1iNjBmLTZmMzc5NmRhODUyMDowNDViYjFiYmE0M2Y5NDU5YTc5OTgxZmEyYTg1NmI4YzhkOGU4YjgyNmNmMzQzZmFmMGNhZTlmNDBjMmZmOTgy",
  "linkToken": "U2FtcGxlIFNESyB0b2tlbgpTYW1wbGUgU0RLIHRva2VuClNhbXBsZSBTREsgdG9rZW4KU2FtcGxlIFNESyB0b2tlbg=="
}
Copy linkIntegration methods
The response returned from the Link userAPI endpoint is used in all of the available integration methods described below.
Copy linkMobile SDKs
If you are providing an iOS or Android app, whether fully native or written via frameworks such as React Native or Flutter, our recommended integration method is our mobile SDKs. In this case, you will make use of the linkToken parameter from the Link userAPI endpoint response.
Importantly, integrating with our mobile SDKs is the only way to support Bluetooth verification on iOS and Android devices. Laptop and desktop computers with Chromium based web browsers (such as Google Chrome and Microsoft Edge) installed can access web Bluetooth functionality directly through the browser to perform this verification method.
The SDKs additionally provides increased speed and stability for select authentication methods.
To learn more about our mobile SDKs and how to integrate them in your app, you can read our Link SDK documentation.
Copy linkMobile in-app browsers
You can also choose to integrate Link UI via in-app web browsers if your use case or enabled brands do not require Bluetooth verification. In this case, you will make use of the linkUrl parameter in the Link userAPI endpoint response. Please refer to our recommendations below if you opt for this method, as these include critical navigation functionality that is necessary to support OAuth authentication flows and linking out to third-party help pages.
- For iOS apps, we recommend going the ASWebAuthenticationSession route. This is what Apple recommends for authenticating users through web services.
- For Android apps, we recommend going the Custom Tabs route. This is what Google recommends for these use cases.
Common for both iOS and Android recommendations are that they also ensure essential security features and password manager support are in place. Both options also expose the URL of the page your user is viewing (link.enode.com), which is more transparent and can help build trust with users.
Copy linkWeb redirects
If you do not have a mobile app, and want to present Link UI from a web page, the recommended method is using traditional redirects. In this case, you will make use of the linkUrl parameter from the Link userAPI endpoint response. This follows a similar pattern to traditional OAuth flows, and should be familiar for users.
For security reasons, Link UI cannot be presented in an iframe or modal view directly inside of your app UI.
Copy linkLinking multiple types of assets simultaneously
Since version 2024-01-01 and later, it became possible to link multiple types of assets at once. This is particularly useful when connecting solar inverters with batteries or when connecting vendors like Tesla with a wide range of devices supported by Enode. Learn more about multi-type linking.
Copy linkCustomizing Link UI
Copy linkExposed brands
Copy linkControlling selectable brands
The brands exposed on the brand selection screen can easily be enabled or disabled via the enabled brands settings for your client in your dashboard. By default, all brands that are not flagged with Activation required in our brands overview will be enabled.
If a user still can’t find their brand, Link UI can let them request it. This is a useful signal: sometimes it’s a brand Enode doesn’t support yet, and sometimes it’s one you simply haven’t enabled here. See Unsupported brands to learn how to capture that demand.
Copy linkSkipping the brand selection step
The brand selection step can be omitted if you opt for presenting a brand selection UI in your app in place of this view. This is done by adding the vendor parameter when initiating the linking session, (e.g. vendor: “TESLA”).
Please note that your user will still be presented with the introduction step, followed by the review data access step when you have specified the vendor parameter. The service selection view cannot be skipped.
Copy linkLanguages
The Link UI interface is currently available in 13 languages, as listed below. You can choose to set the language to match your app, or let it follow your user’s web browser language. We recommend matching the language of your app to the language in LinkUI where possible in order to make the transition more seamless.
| Language ISO code | Language |
|---|---|
en-US | English (US) |
en-GB | English (GB) |
nb-NO | Norwegian (bokmål) |
sv-SE | Swedish |
da-DK | Danish |
fi-FI | Finnish |
nl-NL | Dutch |
nl-BE | Dutch (Belgium) |
fr-FR | French |
it-IT | Italian |
de-DE | German |
es-ES | Spanish |
pt-PT | Portuguese |
ro-RO | Romanian |
You can also choose to set the language parameter as language: “browser”. This defaults to the language of your user by looking at their browser’s Accept-Language header (learn more), and falls back to en-US if no match is found. This is only recommended if we don’t yet support the language of your app.
Copy linkColor schemes
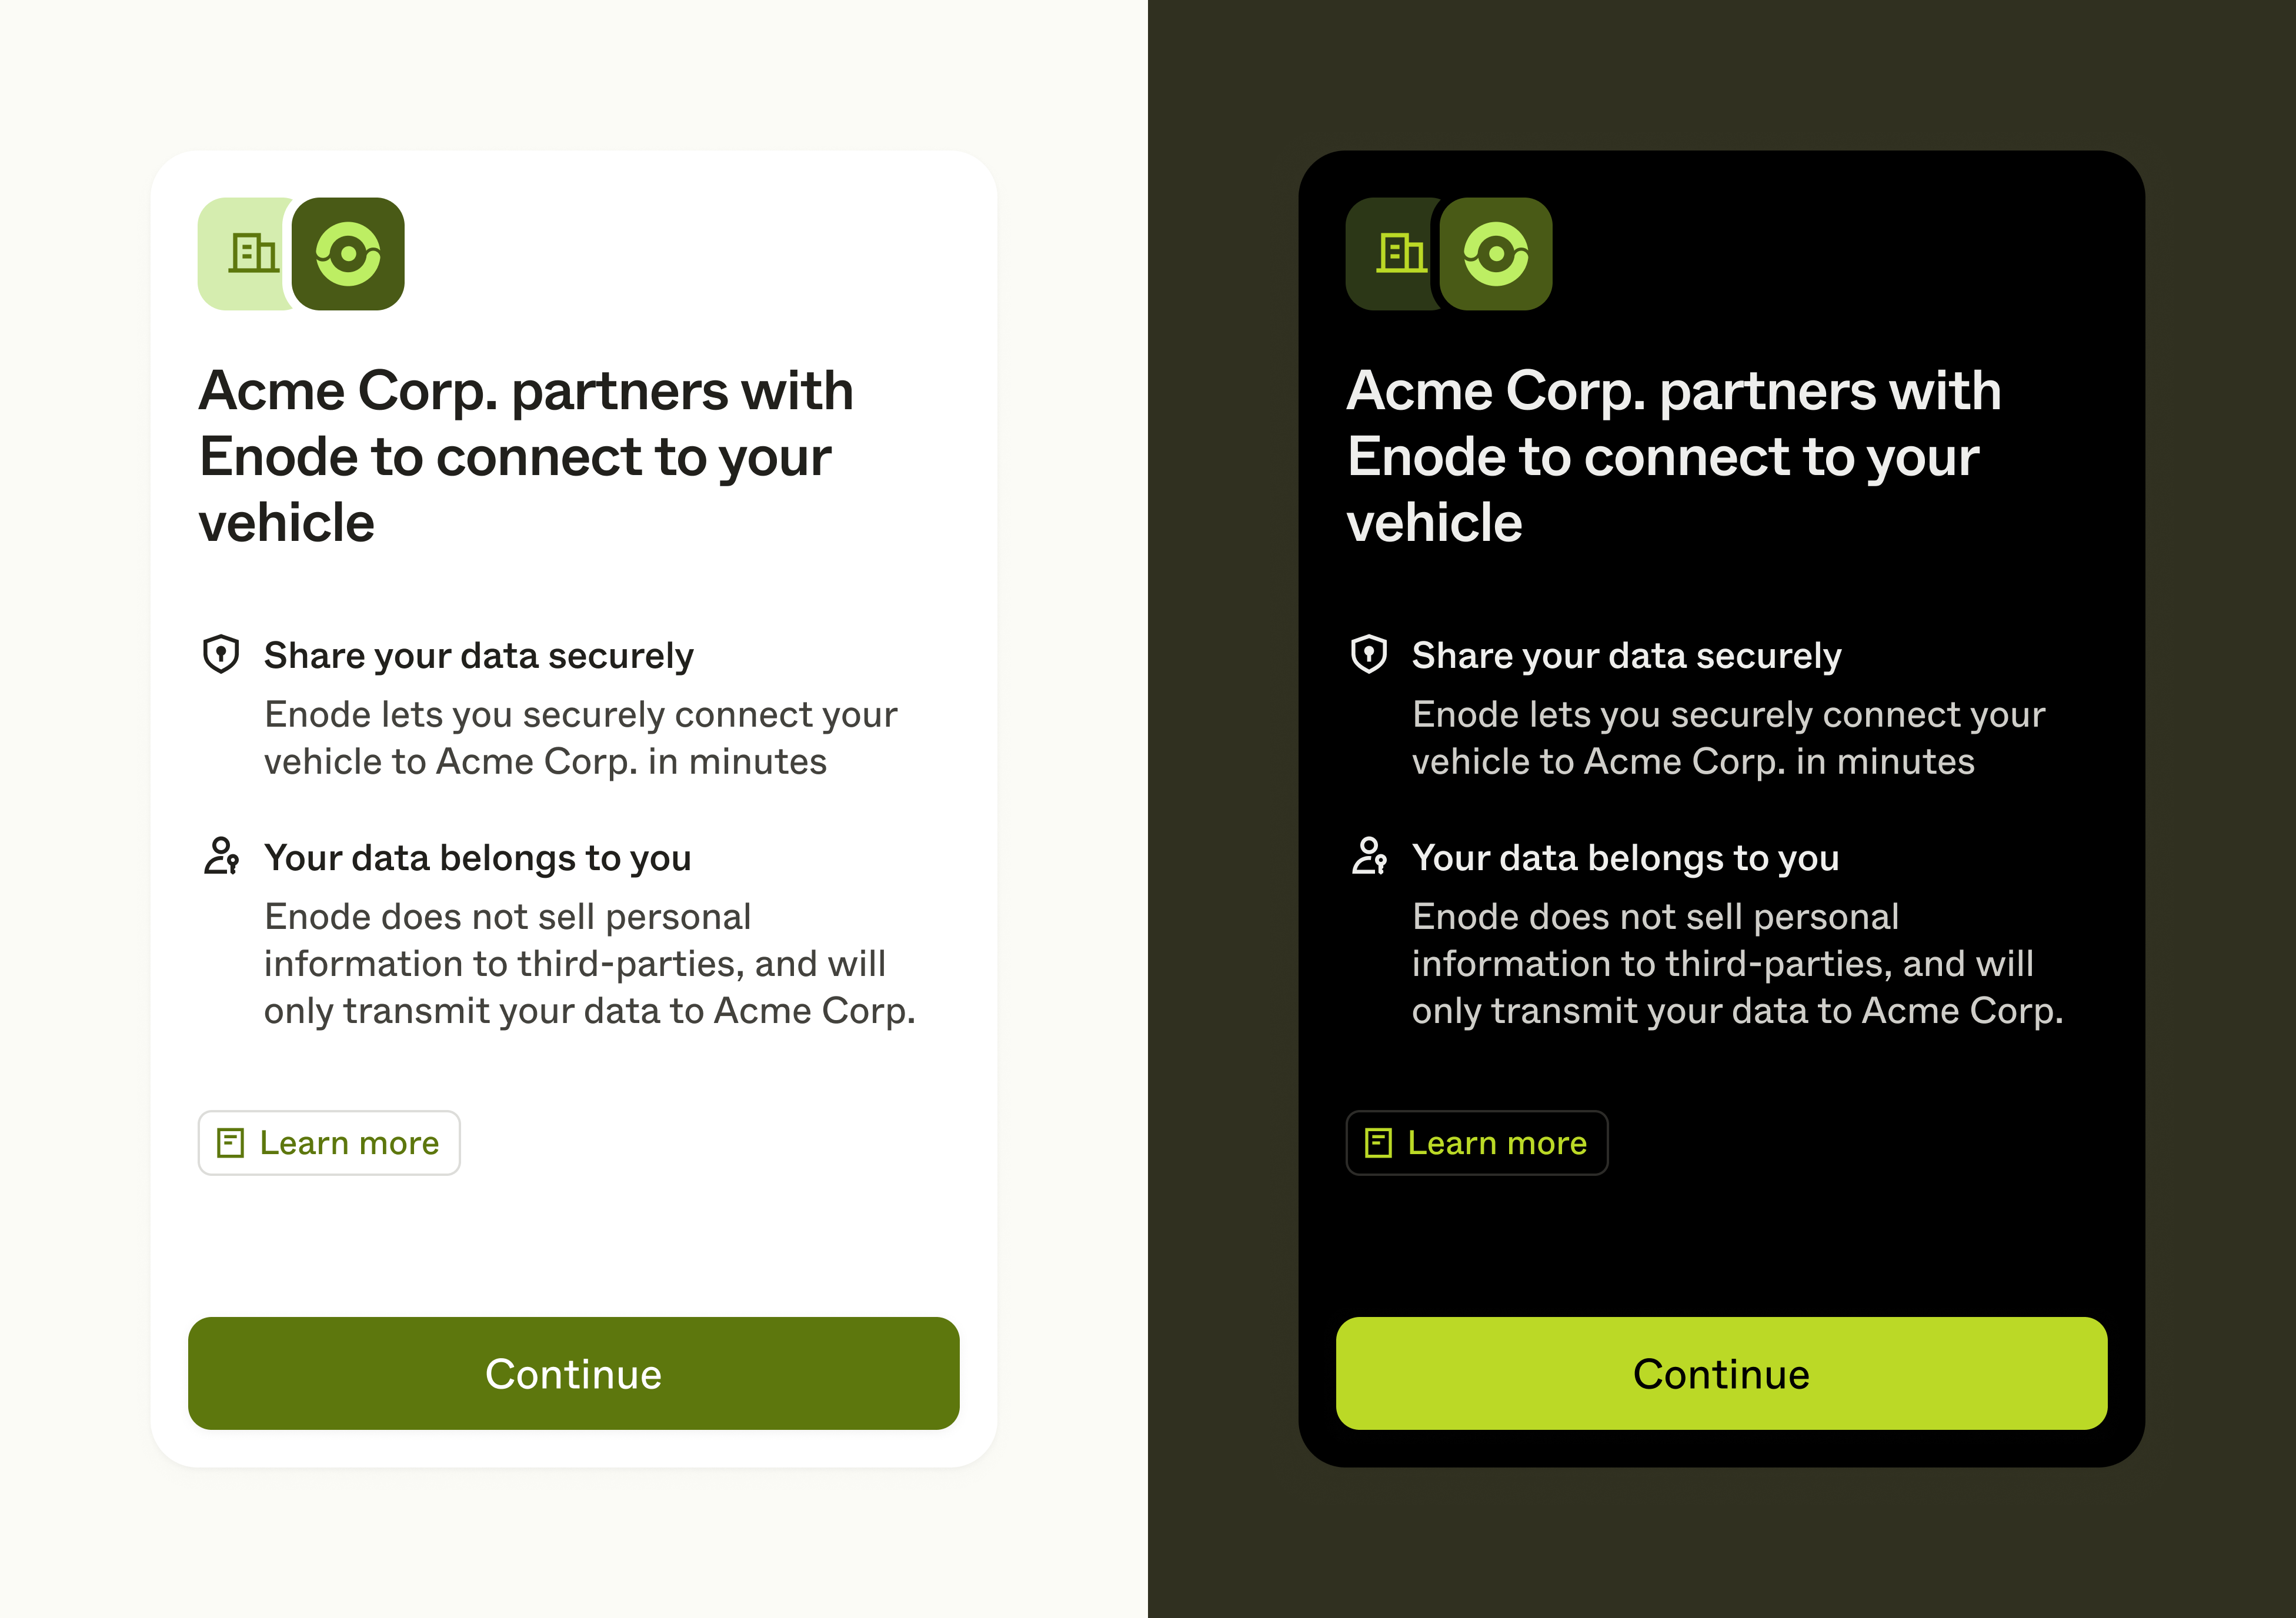
Link UI supports both light and dark modes. You can choose to let this be up to your user’s system preferences by setting the color scheme parameter as colorScheme: “system” — or control this yourself by setting the parameter to either colorScheme: “light” or colorScheme: “dark”.
If your app does not support both a light and dark modes, we recommend setting the color scheme explicitely to match your app color scheme. This eases the transition from your app to Link UI and back.
Copy linkPresenting Link UI to users
Copy linkPlacement in flow
Where you present Link UI as part of your user onboarding flow can greatly impact the conversion rates. As a rule of thumb, we recommend presenting Link UI once your user has a good picture of the benefits they will receive after linking their device. This can be done by highlighting the features you will offer them after a successful connection, such as smart charging for vehicles or scheduling for HVAC units.
If your user onboarding also includes general account setup — such as asking your user to fill in their address and details and creating a password — we recommend breaking the onboarding flow up by letting your user navigate around your app in between the flows. This gives your user a chance to explore your product, and regain focus before going into the device linking process.
Copy linkPreparation
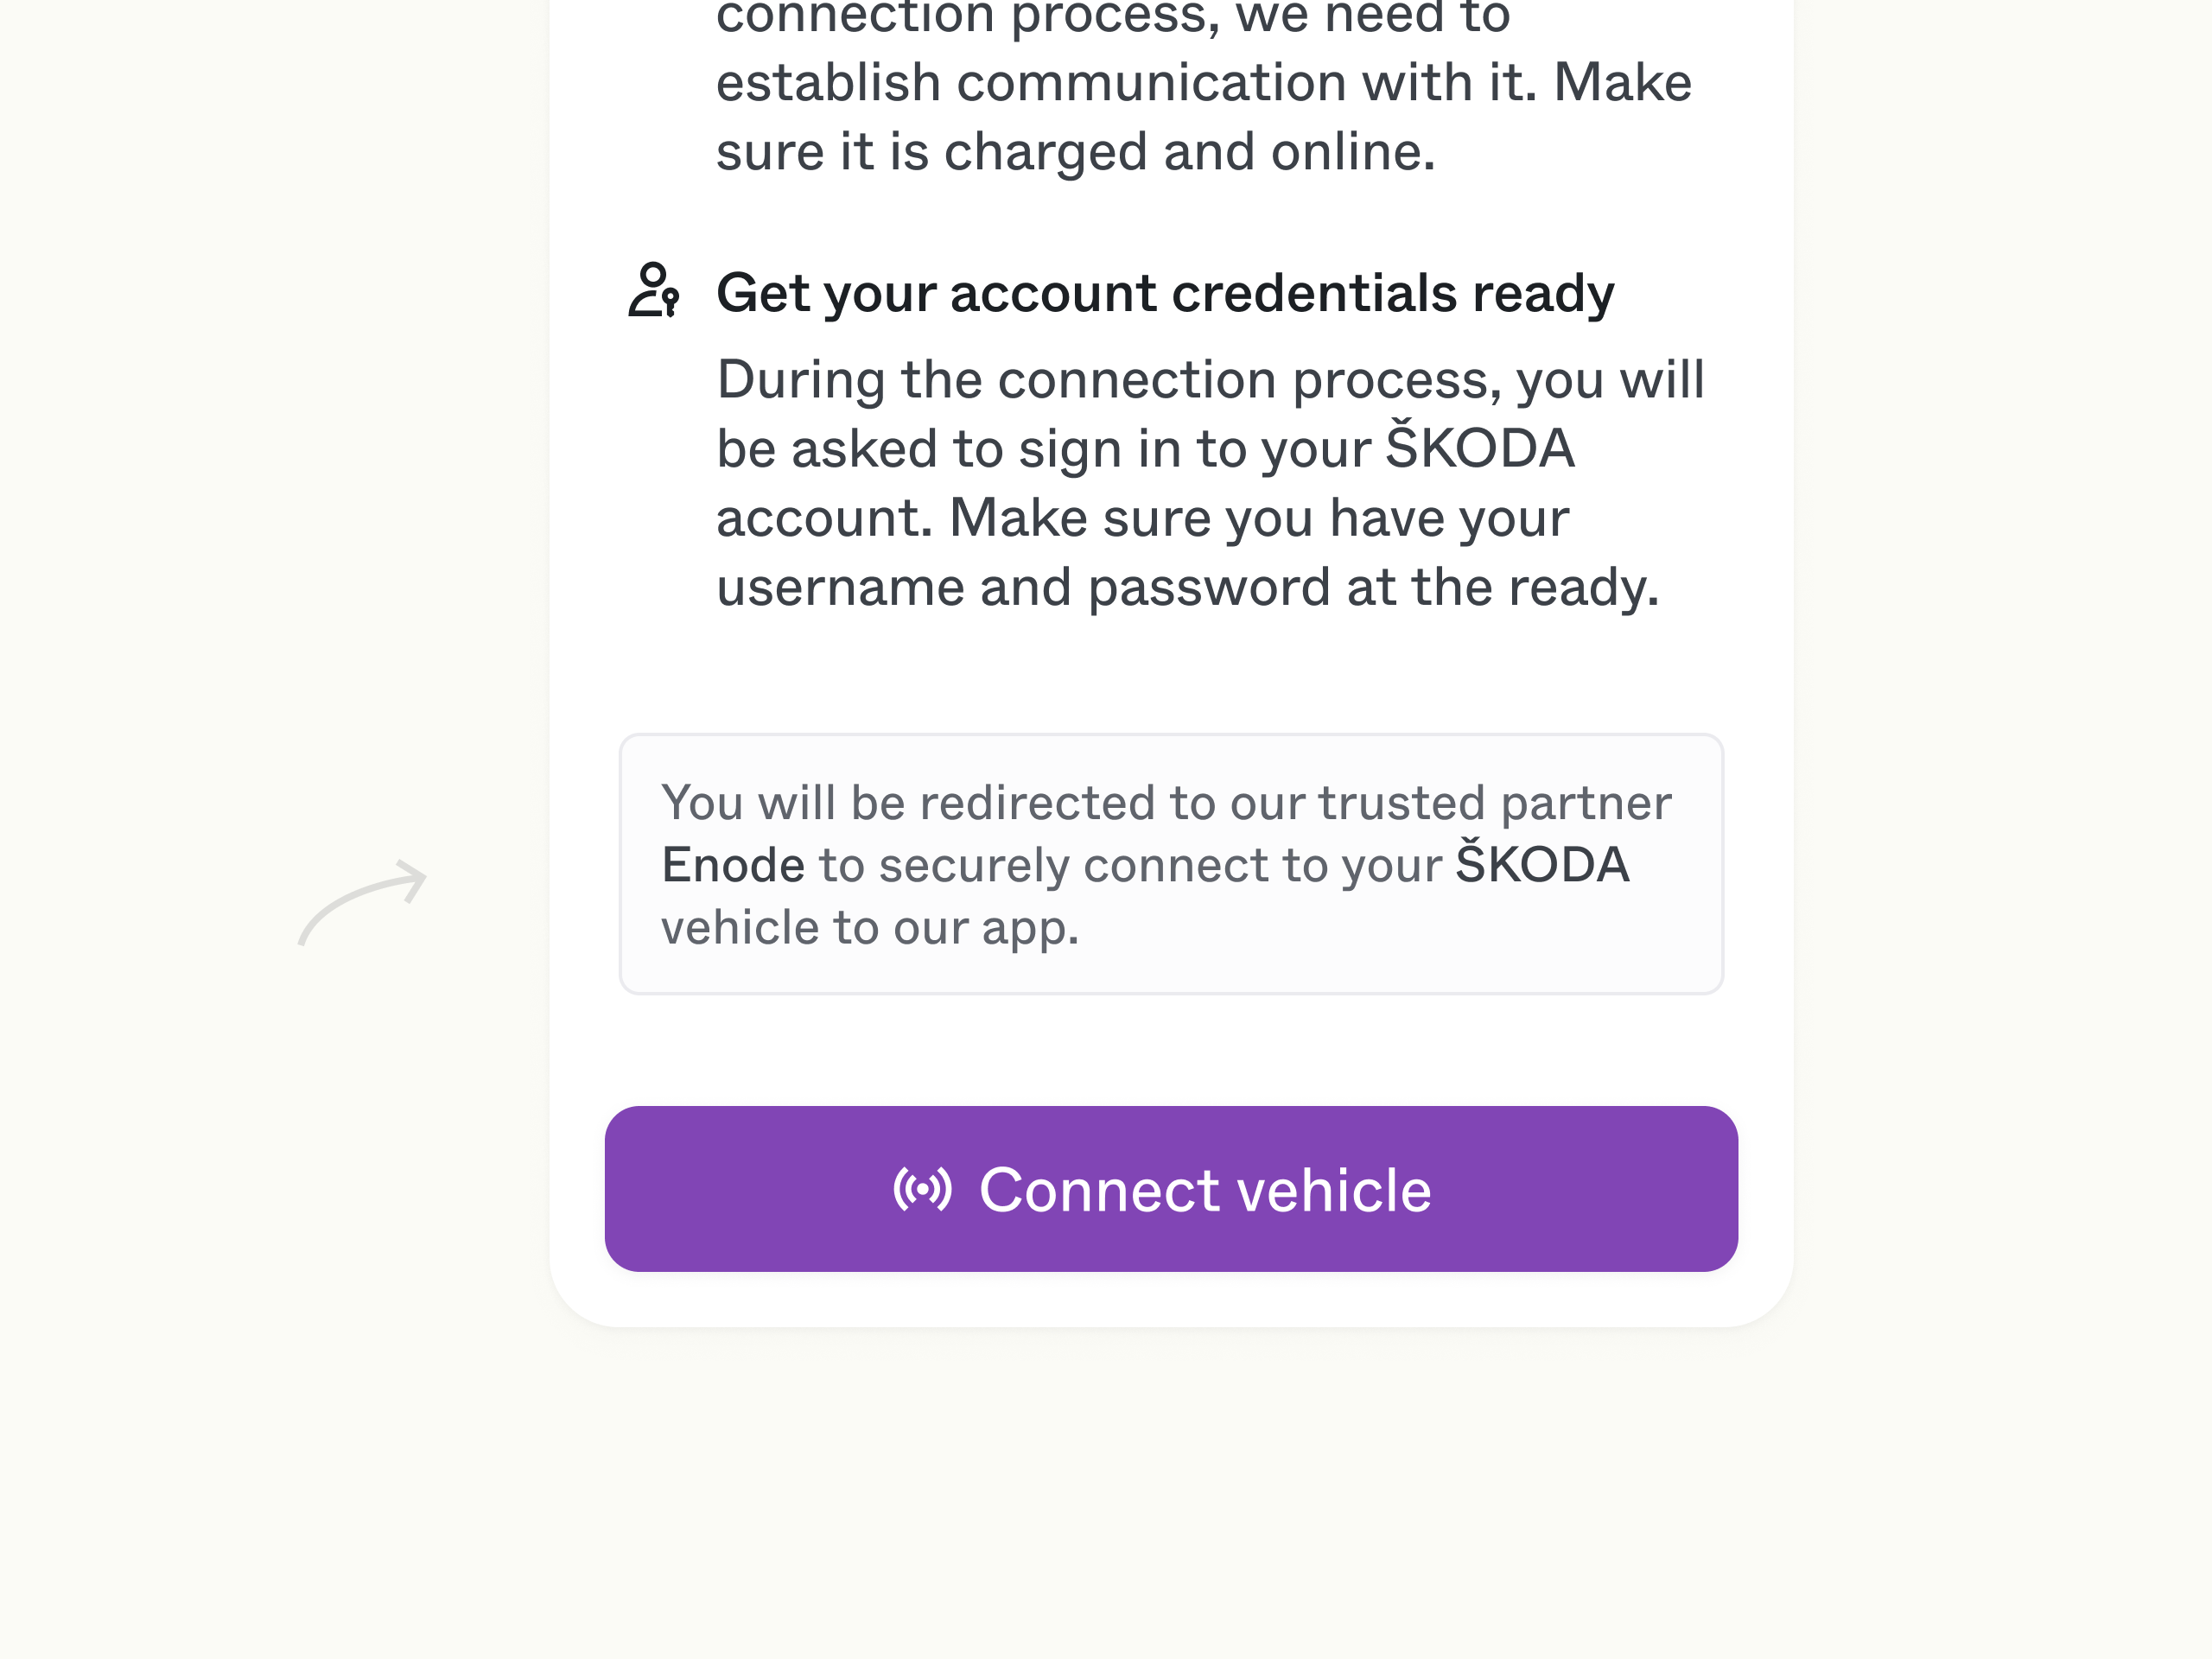
Preparing your user for what is about to happen is also an effective way to ensure good conversion rates through Link UI. This could be done by asking them to prepare the credentials for their account for their device, and giving them a quick overview of the connection process.
Another important part of preparing your user is by introducing Enode as your connection partner. This forms an informational handshake with our introduction view, and is a good way to reassure your users that they are being sent to a trusted partner.
Copy linkCelebrating successfully linked devices
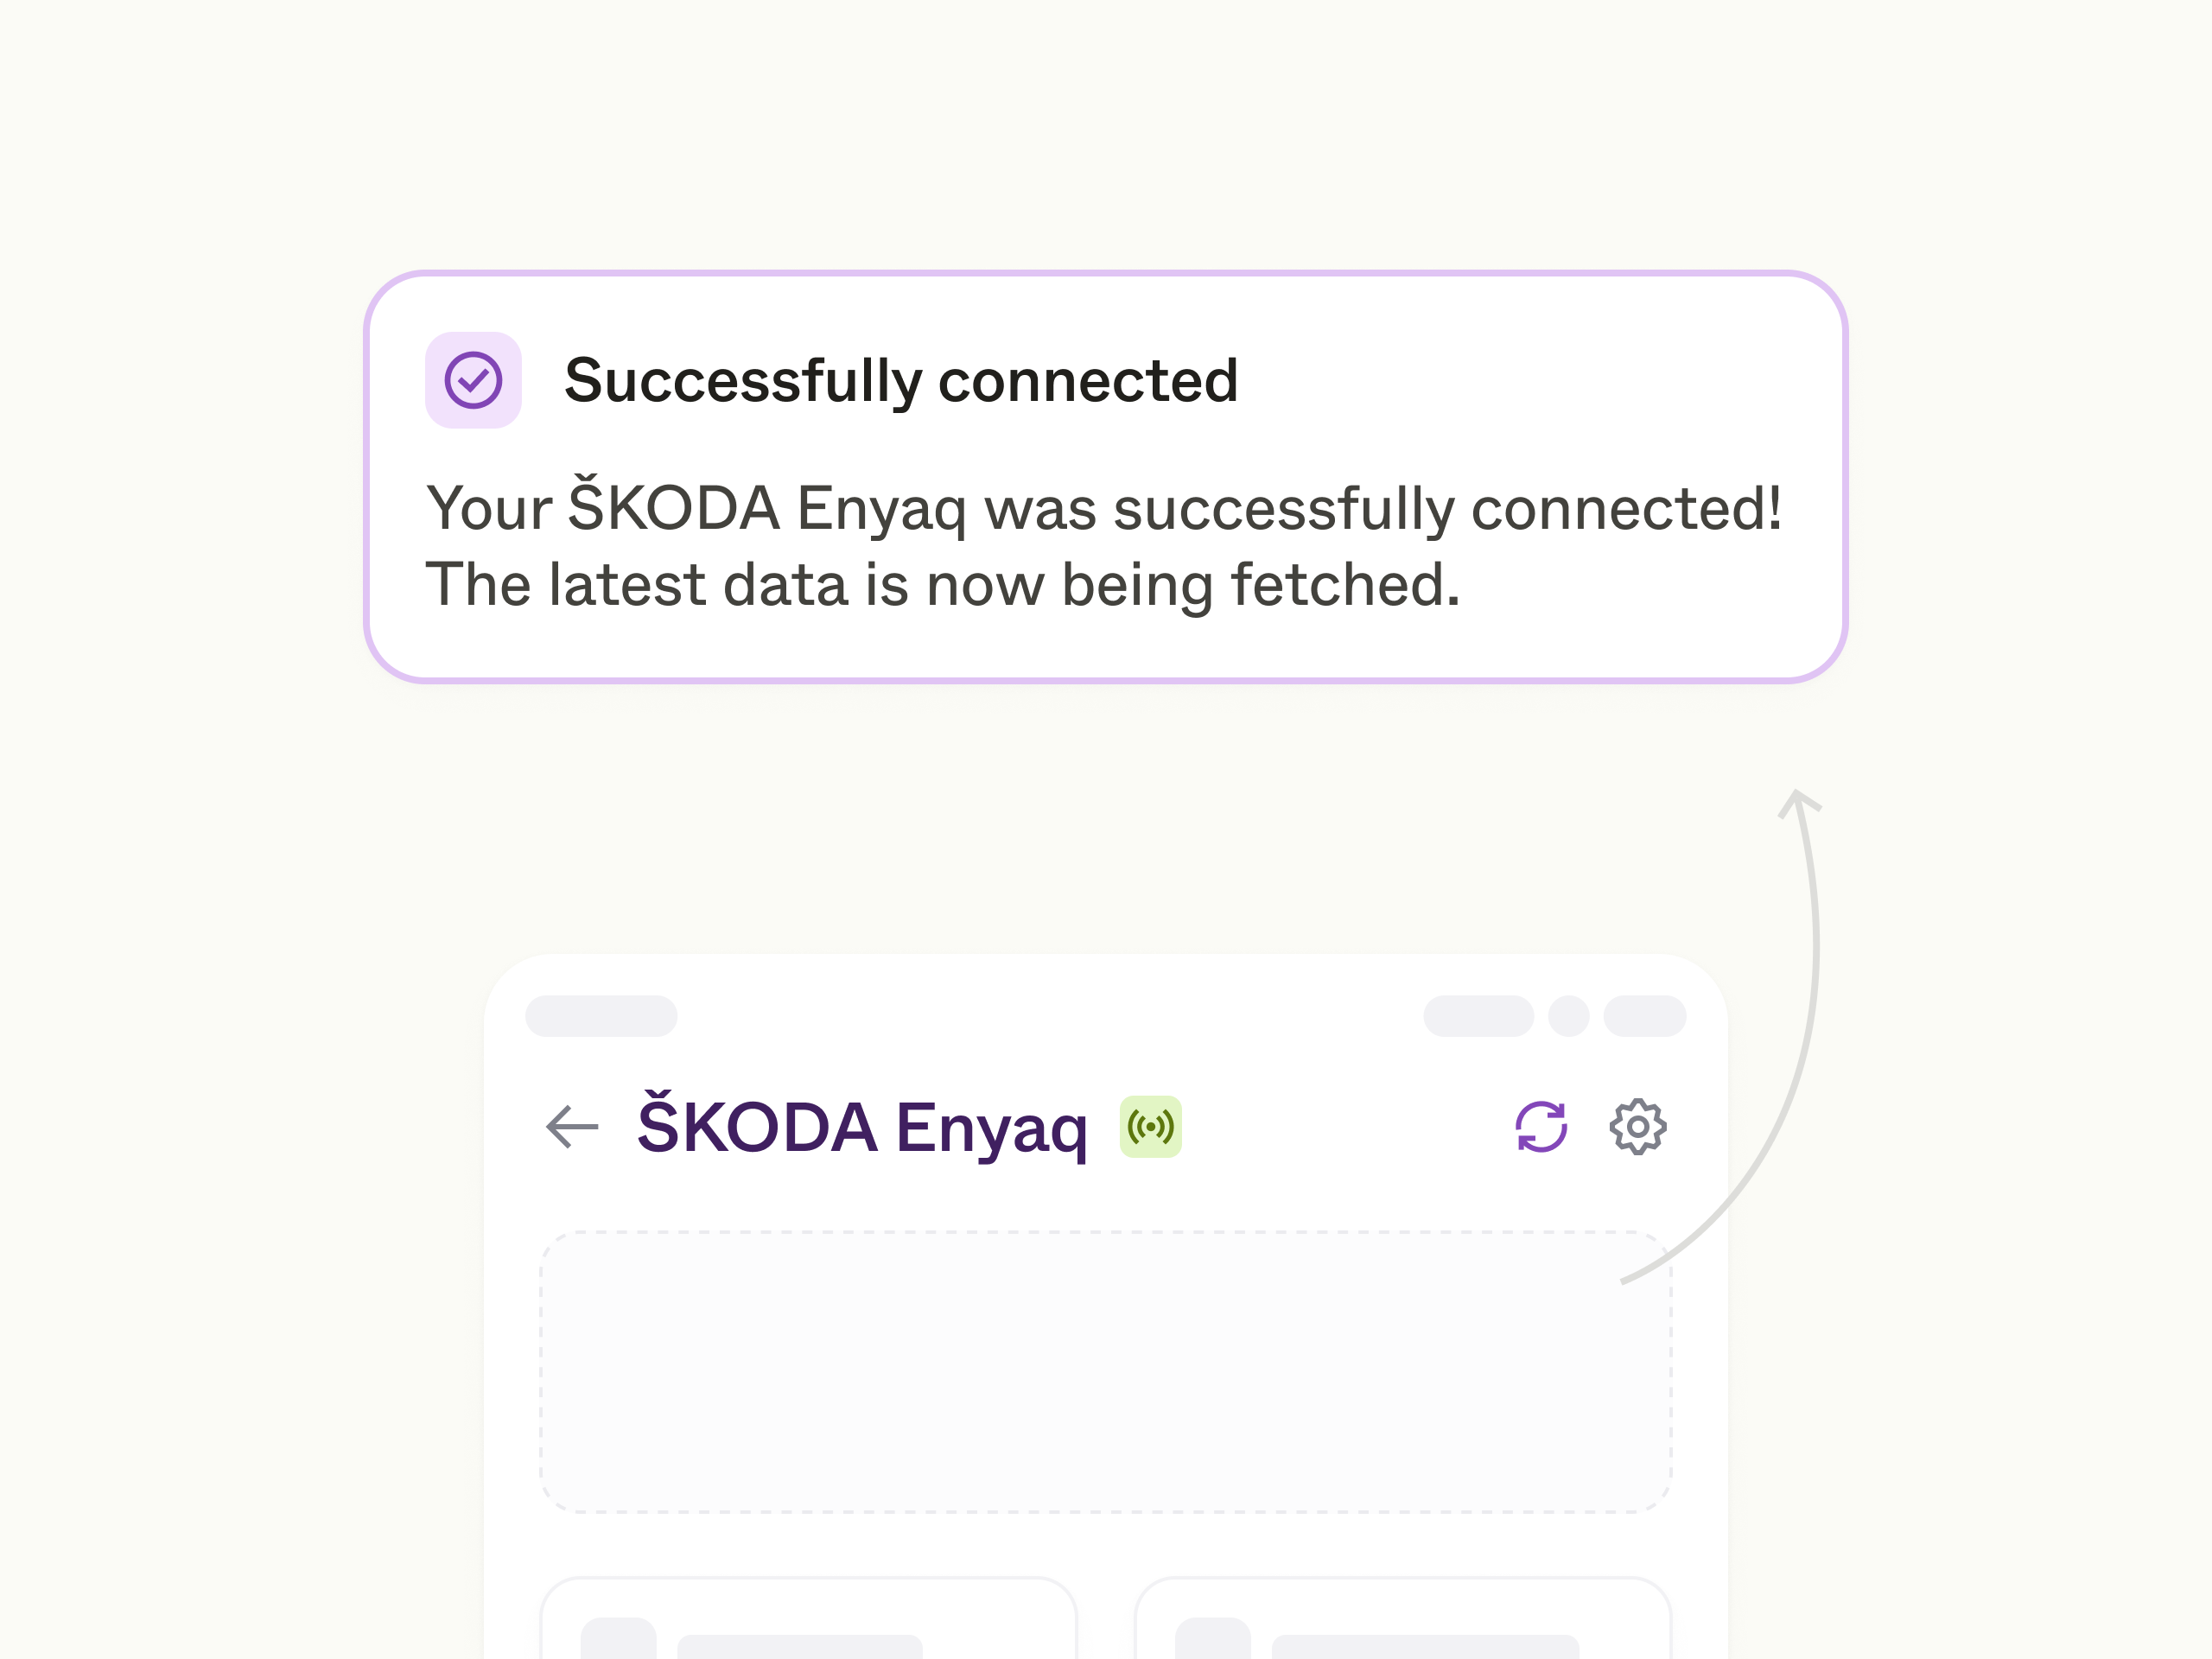
After having successfully linking their device, your user is redirected back to your app. This poses a great opportunity to add some positive reinforcement.